
Weapons
Senatorhung (Talk | contribs) m (→Researchable Advanced Weapons) |
(Fix broken image links) |
||
| (15 intermediate revisions not shown) | |||
| Line 28: | Line 28: | ||
| align="left" | 15 [[Credits|CR]] | | align="left" | 15 [[Credits|CR]] | ||
| align="left" | None | | align="left" | None | ||
| - | | align="center" | | + | | align="center" | {{GameImage|items/autocannon.png}} |
|- | |- | ||
| align="left" | Heavy | | align="left" | Heavy | ||
| Line 39: | Line 39: | ||
| align="left" | 30 [[Credits|CR]] | | align="left" | 30 [[Credits|CR]] | ||
| align="left" | [[Research_Tree#Advanced_Weapons|Advanced Weapons]] | | align="left" | [[Research_Tree#Advanced_Weapons|Advanced Weapons]] | ||
| - | | align="center" | | + | | align="center" | {{GameImage|items/autocannon2.png}} |
|- | |- | ||
| align="left" | Light | | align="left" | Light | ||
| Line 50: | Line 50: | ||
| align="left" | 50 [[Credits|CR]] | | align="left" | 50 [[Credits|CR]] | ||
| align="left" | [[Research_Tree#Advanced_Weapons|Linear Induction]] | | align="left" | [[Research_Tree#Advanced_Weapons|Linear Induction]] | ||
| - | | align="center" | | + | | align="center" | {{GameImage|items/massdriver.png}} |
|- | |- | ||
| align="left" | Medium<small><sup>1</sup></small> | | align="left" | Medium<small><sup>1</sup></small> | ||
| Line 61: | Line 61: | ||
| align="left" | 70 [[Credits|CR]] | | align="left" | 70 [[Credits|CR]] | ||
| align="left" | [[Research_Tree#Advanced_Weapons|Linear Induction]] | | align="left" | [[Research_Tree#Advanced_Weapons|Linear Induction]] | ||
| - | | align="center" | | + | | align="center" | {{GameImage|items/massdriver2.png}} |
|- | |- | ||
| align="left" | Heavy | | align="left" | Heavy | ||
| Line 72: | Line 72: | ||
| align="left" | 98 [[Credits|CR]] | | align="left" | 98 [[Credits|CR]] | ||
| align="left" | [[Research_Tree#Advanced_Weapons|Linear Induction]] | | align="left" | [[Research_Tree#Advanced_Weapons|Linear Induction]] | ||
| - | | align="center" | | + | | align="center" | {{GameImage|items/massdriver3.png}} |
|- | |- | ||
| align="left" | Light | | align="left" | Light | ||
| Line 83: | Line 83: | ||
| align="left" | 192 [[Credits|CR]] | | align="left" | 192 [[Credits|CR]] | ||
| align="left" | [[Research_Tree#Advanced_Weapons|Laser Focusing]] | | align="left" | [[Research_Tree#Advanced_Weapons|Laser Focusing]] | ||
| - | | align="center" | | + | | align="center" | {{GameImage|items/laser.png}} |
|- | |- | ||
| align="left" | Medium<small><sup>1</sup></small> | | align="left" | Medium<small><sup>1</sup></small> | ||
| Line 94: | Line 94: | ||
| align="left" | 269 [[Credits|CR]] | | align="left" | 269 [[Credits|CR]] | ||
| align="left" | [[Research_Tree#Advanced_Weapons|Laser Focusing]] | | align="left" | [[Research_Tree#Advanced_Weapons|Laser Focusing]] | ||
| - | | align="center" | | + | | align="center" | {{GameImage|items/laser2.png}} |
|- | |- | ||
| align="left" | Heavy | | align="left" | Heavy | ||
| Line 105: | Line 105: | ||
| align="left" | 375 [[Credits|CR]] | | align="left" | 375 [[Credits|CR]] | ||
| align="left" | [[Research_Tree#Advanced_Weapons|Laser Focusing]] | | align="left" | [[Research_Tree#Advanced_Weapons|Laser Focusing]] | ||
| - | | align="center" | | + | | align="center" | {{GameImage|items/laser3.png}} |
|- | |- | ||
| align="left" | Light | | align="left" | Light | ||
| Line 116: | Line 116: | ||
| align="left" | 740 [[Credits|CR]] | | align="left" | 740 [[Credits|CR]] | ||
| align="left" | [[Research_Tree#Advanced_Weapons|Ion Channelling]] | | align="left" | [[Research_Tree#Advanced_Weapons|Ion Channelling]] | ||
| - | | align="center" | | + | | align="center" | {{GameImage|items/ion.png}} |
|- | |- | ||
| align="left" | Medium<small><sup>1</sup></small> | | align="left" | Medium<small><sup>1</sup></small> | ||
| Line 127: | Line 127: | ||
| align="left" | 1,000 [[Credits|CR]] | | align="left" | 1,000 [[Credits|CR]] | ||
| align="left" | [[Research_Tree#Advanced_Weapons|Ion Channelling]] | | align="left" | [[Research_Tree#Advanced_Weapons|Ion Channelling]] | ||
| - | | align="center" | | + | | align="center" | {{GameImage|items/ion2.png}} |
|- | |- | ||
| align="left" | Heavy | | align="left" | Heavy | ||
| Line 138: | Line 138: | ||
| align="left" | 1,400 [[Credits|CR]] | | align="left" | 1,400 [[Credits|CR]] | ||
| align="left" | [[Research_Tree#Advanced_Weapons|Ion Channelling]] | | align="left" | [[Research_Tree#Advanced_Weapons|Ion Channelling]] | ||
| - | | align="center" | | + | | align="center" | {{GameImage|items/ion3.png}} |
|- | |- | ||
| align="left" | Light | | align="left" | Light | ||
| Line 149: | Line 149: | ||
| align="left" | 2,800 [[Credits|CR]] | | align="left" | 2,800 [[Credits|CR]] | ||
| align="left" | [[Research_Tree#Advanced_Weapons|Plasma Filtering]] | | align="left" | [[Research_Tree#Advanced_Weapons|Plasma Filtering]] | ||
| - | | align="center" | | + | | align="center" | {{GameImage|items/plasma-c.png}} |
|- | |- | ||
| align="left" | Medium<small><sup>1</sup></small> | | align="left" | Medium<small><sup>1</sup></small> | ||
| Line 160: | Line 160: | ||
| align="left" | 4,000 [[Credits|CR]] | | align="left" | 4,000 [[Credits|CR]] | ||
| align="left" | [[Research_Tree#Advanced_Weapons|Plasma Filtering]] | | align="left" | [[Research_Tree#Advanced_Weapons|Plasma Filtering]] | ||
| - | | align="center" | | + | | align="center" | {{GameImage|items/plasma-c2.png}} |
|- | |- | ||
| align="left" | Heavy | | align="left" | Heavy | ||
| Line 171: | Line 171: | ||
| align="left" | 5,600 [[Credits|CR]] | | align="left" | 5,600 [[Credits|CR]] | ||
| align="left" | [[Research_Tree#Advanced_Weapons|Plasma Filtering]] | | align="left" | [[Research_Tree#Advanced_Weapons|Plasma Filtering]] | ||
| - | | align="center" | | + | | align="center" | {{GameImage|items/plasma-c3.png}} |
|- | |- | ||
| align="left" | Light | | align="left" | Light | ||
| Line 182: | Line 182: | ||
| align="left" | 10,900 [[Credits|CR]] | | align="left" | 10,900 [[Credits|CR]] | ||
| align="left" | [[Research_Tree#Advanced_Weapons|Phased Energy]] | | align="left" | [[Research_Tree#Advanced_Weapons|Phased Energy]] | ||
| - | | align="center" | | + | | align="center" | {{GameImage|items/phase-c.png}} |
|- | |- | ||
| align="left" | Medium<small><sup>1</sup></small> | | align="left" | Medium<small><sup>1</sup></small> | ||
| Line 193: | Line 193: | ||
| align="left" | 15,200 [[Credits|CR]] | | align="left" | 15,200 [[Credits|CR]] | ||
| align="left" | [[Research_Tree#Advanced_Weapons|Phased Energy]] | | align="left" | [[Research_Tree#Advanced_Weapons|Phased Energy]] | ||
| - | | align="center" | | + | | align="center" | {{GameImage|items/phase-c2.png}} |
|- | |- | ||
| align="left" | Heavy | | align="left" | Heavy | ||
| Line 204: | Line 204: | ||
| align="left" | 21,400 [[Credits|CR]] | | align="left" | 21,400 [[Credits|CR]] | ||
| align="left" | [[Research_Tree#Advanced_Weapons|Phased Energy]] | | align="left" | [[Research_Tree#Advanced_Weapons|Phased Energy]] | ||
| - | | align="center" | | + | | align="center" | {{GameImage|items/phase-c3.png}} |
|- | |- | ||
| align="left" | Light | | align="left" | Light | ||
| Line 215: | Line 215: | ||
| align="left" | 41,900 [[Credits|CR]] | | align="left" | 41,900 [[Credits|CR]] | ||
| align="left" | [[Research_Tree#Advanced_Weapons|Graviton Shearing]] | | align="left" | [[Research_Tree#Advanced_Weapons|Graviton Shearing]] | ||
| - | | align="center" | | + | | align="center" | {{GameImage|items/gshearer.png}} |
|- | |- | ||
| align="left" | Medium<small><sup>1</sup></small> | | align="left" | Medium<small><sup>1</sup></small> | ||
| Line 226: | Line 226: | ||
| align="left" | 58,600 [[Credits|CR]] | | align="left" | 58,600 [[Credits|CR]] | ||
| align="left" | [[Research_Tree#Advanced_Weapons|Graviton Shearing]] | | align="left" | [[Research_Tree#Advanced_Weapons|Graviton Shearing]] | ||
| - | | align="center" | | + | | align="center" | {{GameImage|items/gshearer2.png}} |
|- | |- | ||
| align="left" | Heavy | | align="left" | Heavy | ||
| Line 237: | Line 237: | ||
| align="left" | 82,000 [[Credits|CR]] | | align="left" | 82,000 [[Credits|CR]] | ||
| align="left" | [[Research_Tree#Advanced_Weapons|Graviton Shearing]] | | align="left" | [[Research_Tree#Advanced_Weapons|Graviton Shearing]] | ||
| - | | align="center" | | + | | align="center" | {{GameImage|items/gshearer3.png}} |
|- | |- | ||
| align="left" | Light | | align="left" | Light | ||
| Line 248: | Line 248: | ||
| align="left" | 160,000 [[Credits|CR]] | | align="left" | 160,000 [[Credits|CR]] | ||
| align="left" | [[Research_Tree#Advanced_Weapons|Matter Disruption]] | | align="left" | [[Research_Tree#Advanced_Weapons|Matter Disruption]] | ||
| - | | align="center" | | + | | align="center" | {{GameImage|items/nop/light-disruptor.png}} |
|- | |- | ||
| align="left" | Medium<small><sup>1</sup></small> | | align="left" | Medium<small><sup>1</sup></small> | ||
| Line 259: | Line 259: | ||
| align="left" | 225,000 [[Credits|CR]] | | align="left" | 225,000 [[Credits|CR]] | ||
| align="left" | [[Research_Tree#Advanced_Weapons|Matter Disruption]] | | align="left" | [[Research_Tree#Advanced_Weapons|Matter Disruption]] | ||
| - | | align="center" | | + | | align="center" | {{GameImage|items/nop/disruptor.png}} |
|- | |- | ||
| align="left" | Heavy | | align="left" | Heavy | ||
| Line 270: | Line 270: | ||
| align="left" | 315,000 [[Credits|CR]] | | align="left" | 315,000 [[Credits|CR]] | ||
| align="left" | [[Research_Tree#Advanced_Weapons|Matter Disruption]] | | align="left" | [[Research_Tree#Advanced_Weapons|Matter Disruption]] | ||
| - | | align="center" | | + | | align="center" | {{GameImage|items/nop/heavy-disruptor.png}} |
|- | |- | ||
| align="left" | Light | | align="left" | Light | ||
| Line 281: | Line 281: | ||
| align="left" | 617,500 [[Credits|CR]] | | align="left" | 617,500 [[Credits|CR]] | ||
| align="left" | [[Research_Tree#Advanced_Weapons|Quantum Disassembly]] | | align="left" | [[Research_Tree#Advanced_Weapons|Quantum Disassembly]] | ||
| - | | align="center" | | + | | align="center" | {{GameImage|items/q-dev.png}} |
|- | |- | ||
| align="left" | Medium<small><sup>1</sup></small> | | align="left" | Medium<small><sup>1</sup></small> | ||
| Line 292: | Line 292: | ||
| align="left" | 860,000 [[Credits|CR]] | | align="left" | 860,000 [[Credits|CR]] | ||
| align="left" | [[Research_Tree#Advanced_Weapons|Quantum Disassembly]] | | align="left" | [[Research_Tree#Advanced_Weapons|Quantum Disassembly]] | ||
| - | | align="center" | | + | | align="center" | {{GameImage|items/q-dev2.png}} |
|- | |- | ||
| align="left" | Heavy | | align="left" | Heavy | ||
| Line 303: | Line 303: | ||
| align="left" | 1,200,000 [[Credits|CR]] | | align="left" | 1,200,000 [[Credits|CR]] | ||
| align="left" | [[Research_Tree#Advanced_Weapons|Quantum Disassembly]] | | align="left" | [[Research_Tree#Advanced_Weapons|Quantum Disassembly]] | ||
| - | | align="center" | | + | | align="center" | {{GameImage|items/q-dev3.png}} |
|- | |- | ||
| align="left" | Light | | align="left" | Light | ||
| Line 314: | Line 314: | ||
| align="left" | 2,370,000 [[Credits|CR]] | | align="left" | 2,370,000 [[Credits|CR]] | ||
| align="left" | [[Research_Tree#Advanced_Weapons|Micro Singularities]] | | align="left" | [[Research_Tree#Advanced_Weapons|Micro Singularities]] | ||
| - | | align="center" | | + | | align="center" | {{GameImage|items/s-launcher.png}} |
|- | |- | ||
| align="left" | Medium<small><sup>1</sup></small> | | align="left" | Medium<small><sup>1</sup></small> | ||
| Line 325: | Line 325: | ||
| align="left" | 3,320,000 [[Credits|CR]] | | align="left" | 3,320,000 [[Credits|CR]] | ||
| align="left" | [[Research_Tree#Advanced_Weapons|Micro Singularities]] | | align="left" | [[Research_Tree#Advanced_Weapons|Micro Singularities]] | ||
| - | | align="center" | | + | | align="center" | {{GameImage|items/s-launcher2.png}} |
|- | |- | ||
| align="left" | Heavy | | align="left" | Heavy | ||
| Line 336: | Line 336: | ||
| align="left" | 4,650,000 [[Credits|CR]] | | align="left" | 4,650,000 [[Credits|CR]] | ||
| align="left" | [[Research_Tree#Advanced_Weapons|Micro Singularities]] | | align="left" | [[Research_Tree#Advanced_Weapons|Micro Singularities]] | ||
| - | | align="center" | | + | | align="center" | {{GameImage|items/s-launcher3.png}} |
|- | |- | ||
| align="left" | Light | | align="left" | Light | ||
| Line 347: | Line 347: | ||
| align="left" | 9,150,000 [[Credits|CR]] | | align="left" | 9,150,000 [[Credits|CR]] | ||
| align="left" | [[Research_Tree#Advanced_Weapons|Antimatter Streams]] | | align="left" | [[Research_Tree#Advanced_Weapons|Antimatter Streams]] | ||
| - | | align="center" | | + | | align="center" | {{GameImage|items/antimatter-c.png}} |
|- | |- | ||
| align="left" | Medium<small><sup>1</sup></small> | | align="left" | Medium<small><sup>1</sup></small> | ||
| Line 358: | Line 358: | ||
| align="left" | 12,750,000 [[Credits|CR]] | | align="left" | 12,750,000 [[Credits|CR]] | ||
| align="left" | [[Research_Tree#Advanced_Weapons|Antimatter Streams]] | | align="left" | [[Research_Tree#Advanced_Weapons|Antimatter Streams]] | ||
| - | | align="center" | | + | | align="center" | {{GameImage|items/antimatter-c2.png}} |
|- | |- | ||
| align="left" | Heavy | | align="left" | Heavy | ||
| Line 369: | Line 369: | ||
| align="left" | 17,900,000 [[Credits|CR]] | | align="left" | 17,900,000 [[Credits|CR]] | ||
| align="left" | [[Research_Tree#Advanced_Weapons|Antimatter Streams]] | | align="left" | [[Research_Tree#Advanced_Weapons|Antimatter Streams]] | ||
| - | | align="center" | | + | | align="center" | {{GameImage|items/antimatter-c3.png}} |
|- | |- | ||
| align="left" | Light | | align="left" | Light | ||
| Line 380: | Line 380: | ||
| align="left" | 35,000,000 [[Credits|CR]] | | align="left" | 35,000,000 [[Credits|CR]] | ||
| align="left" | [[Research_Tree#Advanced_Weapons|Null Rays]] | | align="left" | [[Research_Tree#Advanced_Weapons|Null Rays]] | ||
| - | | align="center" | | + | | align="center" | {{GameImage|items/nullray.png}} |
|- | |- | ||
| align="left" | Medium<small><sup>1</sup></small> | | align="left" | Medium<small><sup>1</sup></small> | ||
| Line 391: | Line 391: | ||
| align="left" | 49,000,000 [[Credits|CR]] | | align="left" | 49,000,000 [[Credits|CR]] | ||
| align="left" | [[Research_Tree#Advanced_Weapons|Null Rays]] | | align="left" | [[Research_Tree#Advanced_Weapons|Null Rays]] | ||
| - | | align="center" | | + | | align="center" | {{GameImage|items/nullray2.png}} |
|- | |- | ||
| align="left" | Heavy | | align="left" | Heavy | ||
| Line 402: | Line 402: | ||
| align="left" | 67,500,000 [[Credits|CR]] | | align="left" | 67,500,000 [[Credits|CR]] | ||
| align="left" | [[Research_Tree#Advanced_Weapons|Null Rays]] | | align="left" | [[Research_Tree#Advanced_Weapons|Null Rays]] | ||
| - | | align="center" | | + | | align="center" | {{GameImage|items/nullray3.png}} |
|- | |- | ||
| align="left" | Light | | align="left" | Light | ||
| Line 413: | Line 413: | ||
| align="left" | 132,500,000 [[Credits|CR]] | | align="left" | 132,500,000 [[Credits|CR]] | ||
| align="left" | [[Research_Tree#Advanced_Weapons|Thetacron Radiation]] | | align="left" | [[Research_Tree#Advanced_Weapons|Thetacron Radiation]] | ||
| - | | align="center" | | + | | align="center" | {{GameImage|items/thetacron.png}} |
|- | |- | ||
| align="left" | Medium<small><sup>1</sup></small> | | align="left" | Medium<small><sup>1</sup></small> | ||
| Line 424: | Line 424: | ||
| align="left" | 187,500,000 [[Credits|CR]] | | align="left" | 187,500,000 [[Credits|CR]] | ||
| align="left" | [[Research_Tree#Advanced_Weapons|Thetacron Radiation]] | | align="left" | [[Research_Tree#Advanced_Weapons|Thetacron Radiation]] | ||
| - | | align="center" | | + | | align="center" | {{GameImage|items/thetacron2.png}} |
|- | |- | ||
| align="left" | Heavy | | align="left" | Heavy | ||
| Line 435: | Line 435: | ||
| align="left" | 260,000,000 [[Credits|CR]] | | align="left" | 260,000,000 [[Credits|CR]] | ||
| align="left" | [[Research_Tree#Advanced_Weapons|Thetacron Radiation]] | | align="left" | [[Research_Tree#Advanced_Weapons|Thetacron Radiation]] | ||
| - | | align="center" | | + | | align="center" | {{GameImage|items/thetacron3.png}} |
|- | |- | ||
| align="left" | Light | | align="left" | Light | ||
| Line 446: | Line 446: | ||
| align="left" | 510,000,000 [[Credits|CR]] | | align="left" | 510,000,000 [[Credits|CR]] | ||
| align="left" | [[Research_Tree#Advanced_Weapons|Quasi-Chaotic Force]] | | align="left" | [[Research_Tree#Advanced_Weapons|Quasi-Chaotic Force]] | ||
| - | | align="center" | | + | | align="center" | {{GameImage|items/chaosgun.png}} |
|- | |- | ||
| align="left" | Medium<small><sup>1</sup></small> | | align="left" | Medium<small><sup>1</sup></small> | ||
| Line 457: | Line 457: | ||
| align="left" | 725,000,000 [[Credits|CR]] | | align="left" | 725,000,000 [[Credits|CR]] | ||
| align="left" | [[Research_Tree#Advanced_Weapons|Quasi-Chaotic Force]] | | align="left" | [[Research_Tree#Advanced_Weapons|Quasi-Chaotic Force]] | ||
| - | | align="center" | | + | | align="center" | {{GameImage|items/chaosgun2.png}} |
|- | |- | ||
| align="left" | Heavy | | align="left" | Heavy | ||
| Line 468: | Line 468: | ||
| align="left" | 1,025,000,000 [[Credits|CR]] | | align="left" | 1,025,000,000 [[Credits|CR]] | ||
| align="left" | [[Research_Tree#Advanced_Weapons|Quasi-Chaotic Force]] | | align="left" | [[Research_Tree#Advanced_Weapons|Quasi-Chaotic Force]] | ||
| - | | align="center" | | + | | align="center" | {{GameImage|items/chaosgun3.png}} |
|} | |} | ||
---- | ---- | ||
| Line 503: | Line 503: | ||
| align="center" | NPC: [[Bane Revenant]] | | align="center" | NPC: [[Bane Revenant]] | ||
| align="center" | 4 Bane Emitters | | align="center" | 4 Bane Emitters | ||
| - | | align="center" | | + | | align="center" | {{GameImage|items/banecannon.png}} |
| align="center" | ? [[Credits|CR]] | | align="center" | ? [[Credits|CR]] | ||
| align="center" | 2010 Event | | align="center" | 2010 Event | ||
| Line 514: | Line 514: | ||
| align="center" | NPC: [[Bane Revenant]] | | align="center" | NPC: [[Bane Revenant]] | ||
| align="center" | 4 Bane Emitters | | align="center" | 4 Bane Emitters | ||
| - | | align="center" | | + | | align="center" | {{GameImage|items/banecannon.png}} |
| align="center" | 25,000 [[Credits|CR]] | | align="center" | 25,000 [[Credits|CR]] | ||
| align="center" | 2010 Event | | align="center" | 2010 Event | ||
| Line 525: | Line 525: | ||
| align="center" | NPC: [[Bane Eidolon]] | | align="center" | NPC: [[Bane Eidolon]] | ||
| align="center" | 4 Bane Emitters | | align="center" | 4 Bane Emitters | ||
| - | | align="center" | | + | | align="center" | {{GameImage|items/banecannon2.png}} |
| align="center" | 250,000 [[Credits|CR]] | | align="center" | 250,000 [[Credits|CR]] | ||
| align="center" | 2011 Event | | align="center" | 2011 Event | ||
| Line 536: | Line 536: | ||
| align="center" | NPC: [[Bane Eidolon]] | | align="center" | NPC: [[Bane Eidolon]] | ||
| align="center" | 4 Bane Emitters | | align="center" | 4 Bane Emitters | ||
| - | | align="center" | | + | | align="center" | {{GameImage|items/banecannon3.png}} |
| align="center" | 2,500,000 [[Credits|CR]] | | align="center" | 2,500,000 [[Credits|CR]] | ||
| align="center" | 2011 Event | | align="center" | 2011 Event | ||
| Line 547: | Line 547: | ||
| align="center" | NPC: [[Bane Reaver]] | | align="center" | NPC: [[Bane Reaver]] | ||
| align="center" | 4 Bane Emitters | | align="center" | 4 Bane Emitters | ||
| - | | align="center" | | + | | align="center" | {{GameImage|items/hbcannon4.png}} |
| align="center" | 50,000,000 [[Credits|CR]] | | align="center" | 50,000,000 [[Credits|CR]] | ||
| align="center" | 2012 Event | | align="center" | 2012 Event | ||
| Line 558: | Line 558: | ||
| align="center" | NPC: [[Bane Phantom]] | | align="center" | NPC: [[Bane Phantom]] | ||
| align="center" | 4 Bane Emitters | | align="center" | 4 Bane Emitters | ||
| - | | align="center" | | + | | align="center" | {{GameImage|artifacts/hbcannon5.png}} |
| align="center" | 500M [[Credits|CR]] | | align="center" | 500M [[Credits|CR]] | ||
| align="center" | 2013 Event | | align="center" | 2013 Event | ||
| Line 569: | Line 569: | ||
| align="center" | NPC: [[Bane Dread]] | | align="center" | NPC: [[Bane Dread]] | ||
| align="center" | 4 Bane Emitters | | align="center" | 4 Bane Emitters | ||
| - | | align="center" | | + | | align="center" | {{GameImage|artifacts/hbcannon6.png}} |
| align="center" | 1B [[Credits|CR]] | | align="center" | 1B [[Credits|CR]] | ||
| align="center" | 2014 Event | | align="center" | 2014 Event | ||
|- | |- | ||
| - | | align="center" | Dark | + | | align="center" | [[Dreadcharged Bane Emitter]]<small><sup>3</sup></small> |
| + | | align="center" | 17 | ||
| + | | align="center" | 150 | ||
| + | | align="Center" | +150 invasion-only attack | ||
| + | | align="center" | 8.82 | ||
| + | | align="center" | NPC: [[Bane Dread]] | ||
| + | | align="center" | 4 Bane Emitters | ||
| + | | align="center" | {{GameImage|artifacts/banecannon6.png}} | ||
| + | | align="center" | ?B [[Credits|CR]] | ||
| + | | align="center" | 2017 Event | ||
| + | |- | ||
| + | | align="center" | [[Vilecharged Bane Emitter]]<small><sup>3</sup></small> | ||
| + | | align="center" | 17 | ||
| + | | align="center" | 180 | ||
| + | | align="Center" | +180 invasion-only attack | ||
| + | | align="center" | 10.58 | ||
| + | | align="center" | NPC: [[Bane Fright]] | ||
| + | | align="center" | 4 Bane Emitters | ||
| + | | align="center" | {{GameImage|artifacts/banecannon7.png}} | ||
| + | | align="center" | ?B [[Credits|CR]] | ||
| + | | align="center" | 2018 Event | ||
| + | |- | ||
| + | | align="center" | [[Foulcharged Bane Emitter]]<small><sup>3</sup></small> | ||
| + | | align="center" | 17 | ||
| + | | align="center" | 220 | ||
| + | | align="Center" | +220 invasion-only attack | ||
| + | | align="center" | 12.94 | ||
| + | | align="center" | NPC: [[Bane Fright]] | ||
| + | | align="center" | 4 Bane Emitters | ||
| + | | align="center" | {{GameImage|artifacts/banecannon8.png}} | ||
| + | | align="center" | ?B [[Credits|CR]] | ||
| + | | align="center" | 2018 Event | ||
| + | |- | ||
| + | | align="center" | [[Dark Arbalest]] | ||
| align="center" | 15 | | align="center" | 15 | ||
| align="center" | 90 | | align="center" | 90 | ||
| Line 580: | Line 613: | ||
| align="center" | The Artifact market at 58 GP each. | | align="center" | The Artifact market at 58 GP each. | ||
| align="center" | 2 Dark Arbalests | | align="center" | 2 Dark Arbalests | ||
| - | | align="center" | | + | | align="center" | {{GameImage|artifacts/hbampcan2.gif}} |
| align="center" | 857.4K [[Credits|CR]] | | align="center" | 857.4K [[Credits|CR]] | ||
| align="center" | 2014 Event | | align="center" | 2014 Event | ||
| + | |- | ||
| + | | align="center" | [[Dark Arbalest II]] | ||
| + | | align="center" | 15 | ||
| + | | align="center" | 120 | ||
| + | | align="Center" | +100 cloak. Ability (with cooldown): -10% defense to a targeted enemy planet for 1 hour. | ||
| + | | align="center" | 6.000 | ||
| + | | align="center" | The Artifact market at 47 GP each. | ||
| + | | align="center" | 2 Dark Arbalests | ||
| + | | align="center" | {{GameImage|artifacts/hbampcan3.gif}} | ||
| + | | align="center" | ?K [[Credits|CR]] | ||
| + | | align="center" | 2015 Event | ||
| + | |- | ||
| + | | align="center" | [[Dark Arbalest III]] | ||
| + | | align="center" | 15 | ||
| + | | align="center" | 170 | ||
| + | | align="Center" | +140 cloak. Ability (with cooldown): -12% defense to a targeted enemy planet for 1 hour. | ||
| + | | align="center" | 6.000 | ||
| + | | align="center" | The Artifact market at 47 GP each. | ||
| + | | align="center" | 2 Dark Arbalests | ||
| + | | align="center" | {{GameImage|artifacts/hbampcan4.gif}} | ||
| + | | align="center" | ?K [[Credits|CR]] | ||
| + | | align="center" | 2016 Event | ||
| + | |- | ||
| + | | align="center" | [[Dark Arbalest IV]] | ||
| + | | align="center" | 15 | ||
| + | | align="center" | 240 | ||
| + | | align="Center" | +200 cloak. Ability (with cooldown): -15% defense to a targeted enemy planet for 1 hour. | ||
| + | | align="center" | 6.000 | ||
| + | | align="center" | The Artifact market at 47 GP each. | ||
| + | | align="center" | 2 Dark Arbalests | ||
| + | | align="center" | {{GameImage|artifacts/hbampcan5.gif}} | ||
| + | | align="center" | ?K [[Credits|CR]] | ||
| + | | align="center" | 2017 Event | ||
| + | |- | ||
| + | | align="center" | [[Dark Arbalest V]] | ||
| + | | align="center" | 15 | ||
| + | | align="center" | 330 | ||
| + | | align="Center" | +280 cloak. Ability (with cooldown): -19% defense to a targeted enemy planet for 1 hour. | ||
| + | | align="center" | 6.000 | ||
| + | | align="center" | The Artifact market at 47 GP each. | ||
| + | | align="center" | 2 Dark Arbalests | ||
| + | | align="center" | {{GameImage|artifacts/hbampcan6.gif}} | ||
| + | | align="center" | ?K [[Credits|CR]] | ||
| + | | align="center" | 2018 Event | ||
|- | |- | ||
|} | |} | ||
| - | <small><sup>3</sup></small> If you receive one of the above weapons after you kill a [[Bane Revenant]] or [[Bane Eidolon]], the version you receive is based on your rank at the time of receiving it. Ships of Rank 1-49 receive the standard version, ships of Rank 50-149 receive the charged version, and ships of Rank 150 and above randomly receive either the Overcharged or Hypercharged version. The MegaCharged Bane Emitter is only dropped by [[Bane Reaver]]s (ranks 500+), the TerrorCharged Bane Emitter | + | <small><sup>3</sup></small> If you receive one of the above weapons after you kill a [[Bane Revenant]] or [[Bane Eidolon]], the version you receive is based on your rank at the time of receiving it. Ships of Rank 1-49 receive the standard version, ships of Rank 50-149 receive the charged version, and ships of Rank 150 and above randomly receive either the Overcharged or Hypercharged version. The MegaCharged Bane Emitter is only dropped by [[Bane Reaver]]s (ranks 500+), the TerrorCharged Bane Emitter and Horrorcharged Bane Emitter are only dropped by [[Bane Phantom]]s (ranks 1,000+), and the DreadCharged Bane Emitter is only dropped by [[Bane Dread]]s (ranks 1,500+?) or [[Bane Fright]]s (ranks 2,200+?). Once received, these weapons may be installed/used at any time, but they can only be received during the Hallows Bane events. As of 2016, all Bane weapons can be upgraded to the next weapon level with 30% higher stats than the original version of the same type via the [[Bane Emission Corruptor]] artifact. If you haven't got one, just wait until Halloween this year for another chance! |
---- | ---- | ||
| Line 611: | Line 688: | ||
| align="center" | NPC: [[Crimson Armory]], [[Crimson Vault]], [[Vortul, Crimson Annihilator]] | | align="center" | NPC: [[Crimson Armory]], [[Crimson Vault]], [[Vortul, Crimson Annihilator]] | ||
| align="center" | 4 Crimson Weapons | | align="center" | 4 Crimson Weapons | ||
| - | | align="center" | | + | | align="center" | {{GameImage|items/konqul-1.png}} |
| align="center" | ? [[Credits|CR]] | | align="center" | ? [[Credits|CR]] | ||
|- | |- | ||
| Line 621: | Line 698: | ||
| align="center" | NPC: [[Crimson Armory]], [[Vortul, Crimson Annihilator]] | | align="center" | NPC: [[Crimson Armory]], [[Vortul, Crimson Annihilator]] | ||
| align="center" | 4 Crimson Weapons | | align="center" | 4 Crimson Weapons | ||
| - | | align="center" | | + | | align="center" | {{GameImage|items/konqul-2.png}} |
| align="center" | 12,500 [[Credits|CR]] | | align="center" | 12,500 [[Credits|CR]] | ||
|- | |- | ||
| Line 631: | Line 708: | ||
| align="center" | NPC: [[Vortul, Crimson Annihilator]] | | align="center" | NPC: [[Vortul, Crimson Annihilator]] | ||
| align="center" | 4 Crimson Weapons | | align="center" | 4 Crimson Weapons | ||
| - | | align="center" | | + | | align="center" | {{GameImage|items/vortulblast.png}} |
| align="center" | 25,000 [[Credits|CR]] | | align="center" | 25,000 [[Credits|CR]] | ||
|- | |- | ||
| Line 641: | Line 718: | ||
| align="center" | NPC: [[Korteth, Crimson Carrier]] | | align="center" | NPC: [[Korteth, Crimson Carrier]] | ||
| align="center" | 4 Crimson Weapons | | align="center" | 4 Crimson Weapons | ||
| - | | align="center" | | + | | align="center" |{{GameImage|items/vortulblast2.png}} |
| align="center" | 125,000 [[Credits|CR]] | | align="center" | 125,000 [[Credits|CR]] | ||
|- | |- | ||
| Line 651: | Line 728: | ||
| align="center" | NPCs: [[Korteth, Crimson Carrier]] and '''at least''' 4 [[Kelethor, Crimson Hauler]]s | | align="center" | NPCs: [[Korteth, Crimson Carrier]] and '''at least''' 4 [[Kelethor, Crimson Hauler]]s | ||
| align="center" | 4 Crimson Weapons | | align="center" | 4 Crimson Weapons | ||
| - | | align="center" | | + | | align="center" |{{GameImage|items/vortulblast2.png}} |
| align="center" | 375,000 [[Credits|CR]] | | align="center" | 375,000 [[Credits|CR]] | ||
|} | |} | ||
| Line 658: | Line 735: | ||
===Elite PvP Combat - Dominion Cannon Series=== | ===Elite PvP Combat - Dominion Cannon Series=== | ||
| - | The Dominion Cannons can be bought via the battle market of the battle tab. They cost red badges, which themselves can only be gained through fighting and destroying other players. | + | The Dominion Cannons can be bought via the [[Battle Market Artifacts|battle market]] of the battle tab. They cost red badges, which themselves can only be gained through fighting and destroying other players. |
---- | ---- | ||
{|class="wikitable sortable" border="1" cellpadding="5" cellspacing="0" align="top" | {|class="wikitable sortable" border="1" cellpadding="5" cellspacing="0" align="top" | ||
| Line 678: | Line 755: | ||
| align="center" | Battle Market: 40 Red Badges | | align="center" | Battle Market: 40 Red Badges | ||
| align="center" | 4 Dominion Cannons | | align="center" | 4 Dominion Cannons | ||
| - | | align="center" | | + | | align="center" | {{GameImage|artifacts/specgun.png}} |
| align="center" | 5,000 [[Credits|CR]] | | align="center" | 5,000 [[Credits|CR]] | ||
|- | |- | ||
| Line 688: | Line 765: | ||
| align="center" | Battle Market: 72 Red Badges | | align="center" | Battle Market: 72 Red Badges | ||
| align="center" | 4 Dominion Cannons | | align="center" | 4 Dominion Cannons | ||
| - | | align="center" | | + | | align="center" | {{GameImage|artifacts/specgun2.png}} |
| align="center" | 25,000 [[Credits|CR]] | | align="center" | 25,000 [[Credits|CR]] | ||
|- | |- | ||
| Line 698: | Line 775: | ||
| align="center" | Battle Market: 128 Red Badges | | align="center" | Battle Market: 128 Red Badges | ||
| align="center" | 4 Dominion Cannons | | align="center" | 4 Dominion Cannons | ||
| - | | align="center" | | + | | align="center" | {{GameImage|artifacts/specgun3.png}} |
| align="center" | 250,000 [[Credits|CR]] | | align="center" | 250,000 [[Credits|CR]] | ||
|- | |- | ||
| Line 708: | Line 785: | ||
| align="center" | Battle Market: 184 Red Badges<small><sup>4</sup></small> | | align="center" | Battle Market: 184 Red Badges<small><sup>4</sup></small> | ||
| align="center" | 4 Dominion Cannons | | align="center" | 4 Dominion Cannons | ||
| - | | align="center" | | + | | align="center" | {{GameImage|items/btlmgun2.png}} |
| align="center" | 5,000,000 [[Credits|CR]] | | align="center" | 5,000,000 [[Credits|CR]] | ||
|- | |- | ||
| Line 718: | Line 795: | ||
| align="center" | Battle Market: 272 Red Badges<small><sup>5</sup></small> | | align="center" | Battle Market: 272 Red Badges<small><sup>5</sup></small> | ||
| align="center" | 4 Dominion Cannons | | align="center" | 4 Dominion Cannons | ||
| - | | align="center" | | + | | align="center" | {{GameImage|items/btlmgun-up.png}} |
| align="center" | 50,000,000 [[Credits|CR]] | | align="center" | 50,000,000 [[Credits|CR]] | ||
|} | |} | ||
| Line 750: | Line 827: | ||
| align="center" | NPC: [[Bralkir Vicar]] | | align="center" | NPC: [[Bralkir Vicar]] | ||
| align="center" | 1 Bralkir Ritual Chamber | | align="center" | 1 Bralkir Ritual Chamber | ||
| - | | align="center" | | + | | align="center" | {{GameImage|artifacts/bkchamber.png}} |
| align="center" | 75M [[Credits|CR]] | | align="center" | 75M [[Credits|CR]] | ||
|- | |- | ||
| Line 760: | Line 837: | ||
| align="center" | NPC: [[Cosmiren, Elios Luminary]] | | align="center" | NPC: [[Cosmiren, Elios Luminary]] | ||
| align="center" | 2 Elios Stormburst Rays | | align="center" | 2 Elios Stormburst Rays | ||
| - | | align="center" | | + | | align="center" | {{GameImage|items/eliosgen.png}} |
| align="center" | 75M [[Credits|CR]] | | align="center" | 75M [[Credits|CR]] | ||
|- | |- | ||
| - | | align="center" | [[Furlinium-D | + | | align="center" | [[Furlinium-D Spanner]] |
| align="center" | 20 | | align="center" | 20 | ||
| align="center" | 70 | | align="center" | 70 | ||
| align="Center" | 80 Cloak | | align="Center" | 80 Cloak | ||
| align="center" | 3.5 | | align="center" | 3.5 | ||
| - | | align="center" | NPC: [[Chuhn Merchant]] | + | | align="center" | NPC: [[Chuhn Merchant]] 2014 |
| - | | align="center" | 2 Furlinium-D | + | | align="center" | 2 Furlinium-D Spanners |
| - | | align="center" | [ | + | | align="center" | {{GameImage|items/fdspanner.png}} |
| + | | align="center" | ? [[Credits|CR]] | ||
| + | |- | ||
| + | | align="center" | [[Furlinium-E Spanner]] | ||
| + | | align="center" | 22 | ||
| + | | align="center" | 80 | ||
| + | | align="Center" | 90 Cloak | ||
| + | | align="center" | 3.63 | ||
| + | | align="center" | NPC: [[Chuhn Merchant]] 2015 | ||
| + | | align="center" | 2 Furlinium-E Spanners | ||
| + | | align="center" | {{GameImage|items/fespanner.png}} | ||
| + | | align="center" | ? [[Credits|CR]] | ||
| + | |- | ||
| + | | align="center" | [[Furlinium-F Spanner]] | ||
| + | | align="center" | 24 | ||
| + | | align="center" | 100 | ||
| + | | align="Center" | 110 Cloak | ||
| + | | align="center" | 4.16 | ||
| + | | align="center" | NPC: [[Chuhn Merchant]] 2016 | ||
| + | | align="center" | 2 Furlinium-F Spanners | ||
| + | | align="center" | {{GameImage|items/ffspanner.png}} | ||
| + | | align="center" | ? [[Credits|CR]] | ||
| + | |- | ||
| + | | align="center" | [[Furlinium-G Spanner]] | ||
| + | | align="center" | 26 | ||
| + | | align="center" | 130 | ||
| + | | align="Center" | 140 Cloak | ||
| + | | align="center" | 5.0 | ||
| + | | align="center" | NPC: [[Chuhn Merchant]] 2017 | ||
| + | | align="center" | 2 Furlinium-G Spanners | ||
| + | | align="center" | {{GameImage|items/fgspanner.png}} | ||
| + | | align="center" | ? [[Credits|CR]] | ||
| + | |- | ||
| + | | align="center" | [[Furlinium-H Spanner]] | ||
| + | | align="center" | 28 | ||
| + | | align="center" | 170 | ||
| + | | align="Center" | 180 Cloak | ||
| + | | align="center" | 6.07 | ||
| + | | align="center" | NPC: [[Chuhn Merchant]] 2018 | ||
| + | | align="center" | 2 Furlinium-G Spanners | ||
| + | | align="center" | {{GameImage|items/fhspanner.png}} | ||
| align="center" | ? [[Credits|CR]] | | align="center" | ? [[Credits|CR]] | ||
|- | |- | ||
| Line 780: | Line 897: | ||
| align="center" | NPC: [[Reynard, Lazuli Titan]] | | align="center" | NPC: [[Reynard, Lazuli Titan]] | ||
| align="center" | 3 Lazuli Weapons | | align="center" | 3 Lazuli Weapons | ||
| - | | align="center" | | + | | align="center" | {{GameImage|items/lazulimind.png}} |
| align="center" | 25,000 [[Credits|CR]] | | align="center" | 25,000 [[Credits|CR]] | ||
|- | |- | ||
| Line 790: | Line 907: | ||
| align="center" | NPC: [[Drannik Ballistae]] | | align="center" | NPC: [[Drannik Ballistae]] | ||
| align="center" | 4 Drannik Weapons | | align="center" | 4 Drannik Weapons | ||
| - | | align="center" | | + | | align="center" | {{GameImage|items/dballistae.png}} |
| align="center" | 125,000 [[Credits|CR]] | | align="center" | 125,000 [[Credits|CR]] | ||
|- | |- | ||
| Line 800: | Line 917: | ||
| align="center" | NPC: [[Zebeeren, Scruuge Despot]] | | align="center" | NPC: [[Zebeeren, Scruuge Despot]] | ||
| align="center" | 2 Zebeeren's Cannons | | align="center" | 2 Zebeeren's Cannons | ||
| - | | align="center" | | + | | align="center" | {{GameImage|items/scruugegun2.png}} |
| align="center" | ? [[Credits|CR]] | | align="center" | ? [[Credits|CR]] | ||
|} | |} | ||
| - | <small><sup>6</sup></small> The [[Ion Pulse Ballistae]] '''<font color=red>reduces</font>''' your max energy by 40 per Ion Pulse Ballistae when equipped, therefore if all four Ion Pulse Ballistae are equipped, they will reduce your max energy by 160. If unequipped, your max energy will return to normal. It is therefore strongly suggested that you unequip all of your Ion Pulse Ballistae before you level up or use [[Energy Boosters]], such as an [[Energy Cube]], [[Tri-Matrix Emblem]], or [[ | + | <small><sup>6</sup></small> The [[Ion Pulse Ballistae]] '''<font color=red>reduces</font>''' your max energy by 40 per Ion Pulse Ballistae when equipped, therefore if all four Ion Pulse Ballistae are equipped, they will reduce your max energy by 160. If unequipped, your max energy will return to normal. It is therefore strongly suggested that you unequip all of your Ion Pulse Ballistae before you level up or use [[Energy Boosters]], such as an [[Energy Cube]], [[Tri-Matrix Emblem]], or [[Independence Day (daily event)|XX of Independence]], to ensure you receive the maximum energy refill possible from these artifacts. Also do the same thing before you rank up. |
---- | ---- | ||
| Line 829: | Line 946: | ||
| align="center" | Mission: [[Slowing the Prejor Advance]] | | align="center" | Mission: [[Slowing the Prejor Advance]] | ||
| align="center" | 3 Exotic Pulsers | | align="center" | 3 Exotic Pulsers | ||
| - | | align="center" | | + | | align="center" | {{GameImage|items/exoticpulse.png}} |
| align="center" | 2,100 [[Credits|CR]] | | align="center" | 2,100 [[Credits|CR]] | ||
|- | |- | ||
| Line 839: | Line 956: | ||
| align="center" | Mission: [[Harnessing the Weapon]] | | align="center" | Mission: [[Harnessing the Weapon]] | ||
| align="center" | 1 Psionic Amplifier | | align="center" | 1 Psionic Amplifier | ||
| - | | align="center" | | + | | align="center" | {{GameImage|items/psionic.png}} |
| align="center" | 8,600 [[Credits|CR]] | | align="center" | 8,600 [[Credits|CR]] | ||
|- | |- | ||
| Line 849: | Line 966: | ||
| align="center" | NPC: [[Octafari Leviathan]] | | align="center" | NPC: [[Octafari Leviathan]] | ||
| align="center" | 4 Octafari Weapons | | align="center" | 4 Octafari Weapons | ||
| - | | align="center" | | + | | align="center" | {{GameImage|artifacts/octarift.png}} |
| align="center" | 5,000 [[Credits|CR]] | | align="center" | 5,000 [[Credits|CR]] | ||
|- | |- | ||
| Line 859: | Line 976: | ||
| align="center" | Mission: [[Unwelcome Visitors]] | | align="center" | Mission: [[Unwelcome Visitors]] | ||
| align="center" | 4 Taltherian Sentries | | align="center" | 4 Taltherian Sentries | ||
| - | | align="center" | | + | | align="center" | {{GameImage|items/talsentry.png}} |
| align="center" | ? [[Credits|CR]] | | align="center" | ? [[Credits|CR]] | ||
|- | |- | ||
| Line 869: | Line 986: | ||
| align="center" | Mission: [[Furtive Adjustments]] | | align="center" | Mission: [[Furtive Adjustments]] | ||
| align="center" | 1 Dark Smuggler Chassis | | align="center" | 1 Dark Smuggler Chassis | ||
| - | | align="center" | | + | | align="center" | {{GameImage|npcs/darkfscout.png}} |
| align="center" | ? [[Credits|CR]] | | align="center" | ? [[Credits|CR]] | ||
|- | |- | ||
| Line 879: | Line 996: | ||
| align="center" | Mission: [[Desperate Confinement]] | | align="center" | Mission: [[Desperate Confinement]] | ||
| align="center" | 4 Xecti Disruptors | | align="center" | 4 Xecti Disruptors | ||
| - | | align="center" | | + | | align="center" | {{GameImage|items/axjammer.png}} |
| align="center" | 3,700 (?) [[Credits|CR]] | | align="center" | 3,700 (?) [[Credits|CR]] | ||
|- | |- | ||
| Line 889: | Line 1,006: | ||
| align="center" | Mission: [[Desperate Confinement]] | | align="center" | Mission: [[Desperate Confinement]] | ||
| align="center" | 4 Xecti Disruptors | | align="center" | 4 Xecti Disruptors | ||
| - | | align="center" | | + | | align="center" | {{GameImage|items/axjammer.png}} |
| align="center" | 3,700 (?) [[Credits|CR]] | | align="center" | 3,700 (?) [[Credits|CR]] | ||
|- | |- | ||
| Line 899: | Line 1,016: | ||
| align="center" | Mission: [[Desperate Confinement]] | | align="center" | Mission: [[Desperate Confinement]] | ||
| align="center" | 4 Xecti Disruptors | | align="center" | 4 Xecti Disruptors | ||
| - | | align="center" | | + | | align="center" | {{GameImage|items/axjammer.png}} |
| align="center" | 3,700 (?) [[Credits|CR]] | | align="center" | 3,700 (?) [[Credits|CR]] | ||
|- | |- | ||
| Line 909: | Line 1,026: | ||
| align="center" | NPC: [[T.O. Sector Warden]] spawned on completion of Mission: [[Ravyn's Return]] | | align="center" | NPC: [[T.O. Sector Warden]] spawned on completion of Mission: [[Ravyn's Return]] | ||
| align="center" | 3 Cyclobeam Chargers | | align="center" | 3 Cyclobeam Chargers | ||
| - | | align="center" | | + | | align="center" | {{GameImage|items/tgcharge.png}} |
| align="center" | 55M [[Credits|CR]] | | align="center" | 55M [[Credits|CR]] | ||
|- | |- | ||
| Line 919: | Line 1,036: | ||
| align="center" | Mission: [[Weaponizing T-Plasma]] | | align="center" | Mission: [[Weaponizing T-Plasma]] | ||
| align="center" | 3 Gemini Cannons | | align="center" | 3 Gemini Cannons | ||
| - | | align="center" | | + | | align="center" | {{GameImage|artifacts/silgun.png}} |
| align="center" | 25M [[Credits|CR]] | | align="center" | 25M [[Credits|CR]] | ||
|- | |- | ||
| Line 929: | Line 1,046: | ||
| align="center" | Mission: [[A Fateful Decision]] | | align="center" | Mission: [[A Fateful Decision]] | ||
| align="center" | 1 Uldri Wave Ejector | | align="center" | 1 Uldri Wave Ejector | ||
| - | | align="center" | | + | | align="center" | {{GameImage|artifacts/uwaver.png}} |
| align="center" | 150M [[Credits|CR]] | | align="center" | 150M [[Credits|CR]] | ||
|} | |} | ||
| Line 935: | Line 1,052: | ||
<small><sup>7</sup></small> The [[Exotic Pulser]] <font color=red>reduces</font> your max energy by 10 Per Exotic Pulser when equipped, therefore if all three available Exotic Pulsers are equipped, they will reduce your max energy by 30. If unequipped, your max energy will return to normal. Furthermore, it is strongly suggested that you unequip all of your Exotic Pulsers before you level up or use [[Energy Boosters]], such as an [[Energy Cube]], [[Tri-Matrix Emblem]], or [[Artifacts#Limited Time/Special Artifacts|Insignia of Independence]], to ensure you receive the maximum energy refill possible from these artifacts. Also do the same thing before you rank up. | <small><sup>7</sup></small> The [[Exotic Pulser]] <font color=red>reduces</font> your max energy by 10 Per Exotic Pulser when equipped, therefore if all three available Exotic Pulsers are equipped, they will reduce your max energy by 30. If unequipped, your max energy will return to normal. Furthermore, it is strongly suggested that you unequip all of your Exotic Pulsers before you level up or use [[Energy Boosters]], such as an [[Energy Cube]], [[Tri-Matrix Emblem]], or [[Artifacts#Limited Time/Special Artifacts|Insignia of Independence]], to ensure you receive the maximum energy refill possible from these artifacts. Also do the same thing before you rank up. | ||
| - | <small><sup>8</sup></small> Applies a disguise to your ship that makes it appear to be a Dark Smuggler to any other ship that targets you, that is to say, it hides your [[Races|Race]] and [[Professions|Profession]]. It also changes the physical look of your ship to support this illusion. Installing it will make your ship look like | + | <small><sup>8</sup></small> Applies a disguise to your ship that makes it appear to be a Dark Smuggler to any other ship that targets you, that is to say, it hides your [[Races|Race]] and [[Professions|Profession]]. It also changes the physical look of your ship to support this illusion. Installing it will make your ship look like {{GameImage|npcs/darkfscout.png This.] |
<small><sup>9</sup></small> While Installed: [[Races#Zolazin|Zolazin]], [[Professions#Spy|Spies]], and [[Professions#Hacker|Hackers]] get double the [[Cloak]] bonus; meanwhile, [[Races#Konqul|Konqul]], [[Races#Drannik|Drannik]], and [[Professions#Raider|Raiders]] get double the [[Attack]] bonus. | <small><sup>9</sup></small> While Installed: [[Races#Zolazin|Zolazin]], [[Professions#Spy|Spies]], and [[Professions#Hacker|Hackers]] get double the [[Cloak]] bonus; meanwhile, [[Races#Konqul|Konqul]], [[Races#Drannik|Drannik]], and [[Professions#Raider|Raiders]] get double the [[Attack]] bonus. | ||
| Line 967: | Line 1,084: | ||
| align="center" | 1 Carjean Scatterlauncher | | align="center" | 1 Carjean Scatterlauncher | ||
| align="center" | 109.2M [[Credits|CR]] With 3 Bots | | align="center" | 109.2M [[Credits|CR]] With 3 Bots | ||
| - | | align="center" | | + | | align="center" | {{GameImage|artifacts/shadingunch.png}} |
|- | |- | ||
| align="center" | Cerulean Autosync Beam (200% Upgrade) | | align="center" | Cerulean Autosync Beam (200% Upgrade) | ||
| Line 978: | Line 1,095: | ||
| align="center" | 1 Cerulean Autosync Beam | | align="center" | 1 Cerulean Autosync Beam | ||
| align="center" | 1.2B [[Credits|CR]] With 3 Bots | | align="center" | 1.2B [[Credits|CR]] With 3 Bots | ||
| - | | align="center" | | + | | align="center" | {{GameImage|items/ccautosync.gif}} |
|- | |- | ||
| align="center" | Chronostatic Pulser (200% Upgrade) | | align="center" | Chronostatic Pulser (200% Upgrade) | ||
| Line 989: | Line 1,106: | ||
| align="center" | 1 Chronostatic Pulser | | align="center" | 1 Chronostatic Pulser | ||
| align="center" | 109.3M [[Credits|CR]] With 3 Bots | | align="center" | 109.3M [[Credits|CR]] With 3 Bots | ||
| - | | align="center" | | + | | align="center" | {{GameImage|artifacts/cspulser.png}} |
|- | |- | ||
| align="center" | Darmos Drone (200% Upgrade) | | align="center" | Darmos Drone (200% Upgrade) | ||
| Line 1,000: | Line 1,117: | ||
| align="center" | 1 Darmos Drone | | align="center" | 1 Darmos Drone | ||
| align="center" | ? [[Credits|CR]] | | align="center" | ? [[Credits|CR]] | ||
| - | | align="center" | | + | | align="center" | {{GameImage|npcs/darmosdrone.png}} |
|- | |- | ||
| align="center" | Galakis Pirate Ray (200% Upgrade) | | align="center" | Galakis Pirate Ray (200% Upgrade) | ||
| Line 1,011: | Line 1,128: | ||
| align="center" | 1 Pirate Ray | | align="center" | 1 Pirate Ray | ||
| align="center" | 109.3M [[Credits|CR]] With 3 Bots | | align="center" | 109.3M [[Credits|CR]] With 3 Bots | ||
| - | | align="center" | | + | | align="center" | {{GameImage|artifacts/crimpirategun.png}} |
|- | |- | ||
| align="center" | Gammacron Trap Bay | | align="center" | Gammacron Trap Bay | ||
| Line 1,022: | Line 1,139: | ||
| align="center" | 2 Trap Bays | | align="center" | 2 Trap Bays | ||
| align="center" | 38.6M [[Credits|CR]] With 3 Bots | | align="center" | 38.6M [[Credits|CR]] With 3 Bots | ||
| - | | align="center" | | + | | align="center" | {{GameImage|artifacts/gammabay.png}} |
|- | |- | ||
| align="center" | Morphogenic Suits (200% upgrade) | | align="center" | Morphogenic Suits (200% upgrade) | ||
| Line 1,033: | Line 1,150: | ||
| align="center" | 1 Morphogenic Suit | | align="center" | 1 Morphogenic Suit | ||
| align="center" | 1.16B [[Credits|CR]] With 3 Bots | | align="center" | 1.16B [[Credits|CR]] With 3 Bots | ||
| - | | align="center" | | + | | align="center" | {{GameImage|items/morphsuits.png}} |
|- | |- | ||
| align="center" | [[Sniper Drone]] (200% Upgrade) | | align="center" | [[Sniper Drone]] (200% Upgrade) | ||
| Line 1,044: | Line 1,161: | ||
| align="center" | 1 [[Sniper Drone]] | | align="center" | 1 [[Sniper Drone]] | ||
| align="center" | 142.5M [[Credits|CR]] | | align="center" | 142.5M [[Credits|CR]] | ||
| - | | align="center" | | + | | align="center" | {{GameImage|items/sniperdrone.png}} |
|- | |- | ||
| align="center" | [[Vorean Bio-Ray]] | | align="center" | [[Vorean Bio-Ray]] | ||
| Line 1,055: | Line 1,172: | ||
| align="center" | 2 [[Vorean Bio-Ray]]s | | align="center" | 2 [[Vorean Bio-Ray]]s | ||
| align="center" | 50M [[Credits|CR]] | | align="center" | 50M [[Credits|CR]] | ||
| - | | align="center" | | + | | align="center" | {{GameImage|artifacts/voreangun.png}} |
|} | |} | ||
| Line 1,072: | Line 1,189: | ||
Currently only one type of Radiant Weapon is available, the Radiant Surge Cannon. | Currently only one type of Radiant Weapon is available, the Radiant Surge Cannon. | ||
| - | Radiant Surge Cannons are obtained by purchasing the Radiant Surge Cannon artifact from the [[Artifact Market]] at a price of 48 Galaxy Points. When the Radiant Surge Cannon artifact is used from your trade menu, a Radiant Surge cannon will be created and installed on your ship. The [[Radiant Surge Cannon]] that is produced changes depending on what your ship's rank is at the time the artifact was used to create the weapon. | + | Radiant Surge Cannons are obtained by purchasing the Radiant Surge Cannon artifact from the [[Artifact Market]] at a price of 48 Galaxy Points. When the Radiant Surge Cannon artifact is used from your [[Galaxy Legion Interface Trade Tab|trade menu]], a Radiant Surge cannon will be created and installed on your ship. The [[Radiant Surge Cannon]] that is produced changes depending on what your ship's rank is at the time the artifact was used to create the weapon. |
Note: if your level increases whilst you have have one of these weapons, the Cannon will NOT upgrade to match your new level; you will need to buy a new Radiant Surge Cannon for more Galaxy Points. The actual cost of the Cannons is the same regardless of your level. | Note: if your level increases whilst you have have one of these weapons, the Cannon will NOT upgrade to match your new level; you will need to buy a new Radiant Surge Cannon for more Galaxy Points. The actual cost of the Cannons is the same regardless of your level. | ||
| Line 1,078: | Line 1,195: | ||
The highest Cannon observed on a player is Mark IX (9). It is believed that this is the highest available level, as there are players at level 1700+ that still have Mark IX's installed. Also see the note below about the Mark IX cannons; they are not as powerful as they *should* be. | The highest Cannon observed on a player is Mark IX (9). It is believed that this is the highest available level, as there are players at level 1700+ that still have Mark IX's installed. Also see the note below about the Mark IX cannons; they are not as powerful as they *should* be. | ||
| - | * Image: | + | * Image: {{GameImage|items/radiant.png Radiant Surge Cannon]. |
{|class="wikitable sortable" border="1" cellpadding="5" cellspacing="0" align="top" | {|class="wikitable sortable" border="1" cellpadding="5" cellspacing="0" align="top" | ||
| Line 1,201: | Line 1,318: | ||
| align="center" | 2 Decimators | | align="center" | 2 Decimators | ||
| align="center" | 50,000 [[Credits|CR]] | | align="center" | 50,000 [[Credits|CR]] | ||
| - | | align="center" | | + | | align="center" | {{GameImage|artifacts/adecimator.png}} |
|- | |- | ||
| align="center" | [[Biospheric Decimator]] | | align="center" | [[Biospheric Decimator]] | ||
| Line 1,211: | Line 1,328: | ||
| align="center" | 2 Decimators | | align="center" | 2 Decimators | ||
| align="center" | 750,000 [[Credits|CR]] | | align="center" | 750,000 [[Credits|CR]] | ||
| - | | align="center" | | + | | align="center" | {{GameImage|artifacts/adecimatoru.png}} |
|- | |- | ||
| align="center" | [[Cerulean Fighter]] | | align="center" | [[Cerulean Fighter]] | ||
| Line 1,221: | Line 1,338: | ||
| align="center" | 2 Fighters | | align="center" | 2 Fighters | ||
| align="center" | 12.5M [[Credits|CR]] | | align="center" | 12.5M [[Credits|CR]] | ||
| - | | align="center" | | + | | align="center" | {{GameImage|artifacts/m-fighter1.png}} |
|- | |- | ||
| align="center" | [[Chromatic Cannon]] | | align="center" | [[Chromatic Cannon]] | ||
| Line 1,228: | Line 1,345: | ||
| align="center" | +5% Base Attack | | align="center" | +5% Base Attack | ||
| align="center" | 5 | | align="center" | 5 | ||
| - | | align="center" | [[ | + | | align="center" | [[Limited Time Artifacts]] 2013 |
| align="center" | 2 Chromatic Cannons | | align="center" | 2 Chromatic Cannons | ||
| align="center" | ? [[Credits|CR]] | | align="center" | ? [[Credits|CR]] | ||
| - | | align="center" | | + | | align="center" | {{GameImage|items/chromcannon.png}} |
|- | |- | ||
| align="center" | [[Chromatic Cannon 2.0]] | | align="center" | [[Chromatic Cannon 2.0]] | ||
| Line 1,238: | Line 1,355: | ||
| align="center" | +7% Base Attack | | align="center" | +7% Base Attack | ||
| align="center" | 8.33 | | align="center" | 8.33 | ||
| - | | align="center" | [[ | + | | align="center" | [[Limited Time Artifacts]] 2014 |
| align="center" | 2 Chromatic Cannons | | align="center" | 2 Chromatic Cannons | ||
| align="center" | ? [[Credits|CR]] | | align="center" | ? [[Credits|CR]] | ||
| - | | align="center" | | + | | align="center" | {{GameImage|items/chromcannon2.png}} |
|- | |- | ||
| align="center" | [[Chromatic Cannon 3.0]] | | align="center" | [[Chromatic Cannon 3.0]] | ||
| Line 1,248: | Line 1,365: | ||
| align="center" | +9% Base Attack | | align="center" | +9% Base Attack | ||
| align="center" | 11.67 | | align="center" | 11.67 | ||
| - | | align="center" | [[ | + | | align="center" | [[Limited Time Artifacts]] 2015 |
| align="center" | 2 Chromatic Cannons | | align="center" | 2 Chromatic Cannons | ||
| align="center" | ? [[Credits|CR]] | | align="center" | ? [[Credits|CR]] | ||
| - | | align="center" | | + | | align="center" | {{GameImage|items/chromcannon3.png}} |
|- | |- | ||
| align="center" | [[Chromatic Cannon 4.0]] | | align="center" | [[Chromatic Cannon 4.0]] | ||
| Line 1,257: | Line 1,374: | ||
| align="center" | 250 | | align="center" | 250 | ||
| align="center" | +11% Base Attack | | align="center" | +11% Base Attack | ||
| - | | align="center" | | + | | align="center" | 16.66 |
| - | | align="center" | [[ | + | | align="center" | [[Limited Time Artifacts]] 2016 |
| align="center" | 2 Chromatic Cannons | | align="center" | 2 Chromatic Cannons | ||
| align="center" | 81M [[Credits|CR]] | | align="center" | 81M [[Credits|CR]] | ||
| - | | align="center" | | + | | align="center" | {{GameImage|items/chromcannon4.png}} |
| + | |- | ||
| + | | align="center" | [[Chromatic Cannon 5.0]] | ||
| + | | align="center" | 15 | ||
| + | | align="center" | 350 | ||
| + | | align="center" | +13% Base Attack | ||
| + | | align="center" | 23.33 | ||
| + | | align="center" | [[Limited Time Artifacts]] 2017 | ||
| + | | align="center" | 2 Chromatic Cannons | ||
| + | | align="center" | ?M [[Credits|CR]] | ||
| + | | align="center" | {{GameImage|items/chromcannon5.png}} | ||
| + | |- | ||
| + | | align="center" | [[Chromatic Cannon 6.0]] | ||
| + | | align="center" | 15 | ||
| + | | align="center" | 475 | ||
| + | | align="center" | +15% Base Attack | ||
| + | | align="center" | 31.66 | ||
| + | | align="center" | [[Limited Time Artifacts]] 2018 | ||
| + | | align="center" | 2 Chromatic Cannons | ||
| + | | align="center" | ?M [[Credits|CR]] | ||
| + | | align="center" | {{GameImage|items/chromcannon6.png}} | ||
|- | |- | ||
| align="center" | [[CK69 Assault Sentry]] (500% upgrade) | | align="center" | [[CK69 Assault Sentry]] (500% upgrade) | ||
| Line 1,271: | Line 1,408: | ||
| align="center" | 1 CK Assault Sentry | | align="center" | 1 CK Assault Sentry | ||
| align="center" | 600M [[Credits|CR]] | | align="center" | 600M [[Credits|CR]] | ||
| - | | align="center" | | + | | align="center" | {{GameImage|artifacts/ybsentry.png}} |
|- | |- | ||
| align="center" | [[Combat Analyzer]] | | align="center" | [[Combat Analyzer]] | ||
| Line 1,281: | Line 1,418: | ||
| align="center" | 1 Combat Analyzer | | align="center" | 1 Combat Analyzer | ||
| align="center" | 0 [[Credits|CR]] | | align="center" | 0 [[Credits|CR]] | ||
| - | | align="center" | | + | | align="center" | {{GameImage|items/myscannon2.png}} |
|- | |- | ||
| align="center" | [[Composite Ray]] | | align="center" | [[Composite Ray]] | ||
| Line 1,291: | Line 1,428: | ||
| align="center" | 1 Exotic Bio-Disrupter | | align="center" | 1 Exotic Bio-Disrupter | ||
| align="center" | 40M [[Credits|CR]] | | align="center" | 40M [[Credits|CR]] | ||
| - | | align="center" | | + | | align="center" | {{GameImage|items/myscannon2.png}} |
| - | + | ||
| - | + | ||
| - | + | ||
| - | + | ||
| - | + | ||
| - | + | ||
| - | + | ||
| - | + | ||
| - | + | ||
| - | + | ||
|- | |- | ||
| align="center" | [[Cosmic Rail]] (500% upgrade) | | align="center" | [[Cosmic Rail]] (500% upgrade) | ||
| Line 1,311: | Line 1,438: | ||
| align="center" | 1 Cosmic Rail | | align="center" | 1 Cosmic Rail | ||
| align="center" | 300M [[Credits|CR]] | | align="center" | 300M [[Credits|CR]] | ||
| - | | align="center" | [ | + | | align="center" | {{GameImage|items/niscannon.png}} |
| + | |- | ||
| + | | align="center" | [[Cyclopean Lens]] | ||
| + | | align="center" | 15 | ||
| + | | align="center" | 250 | ||
| + | | align="center" | Ability W/ cooldown: +1% attack bonus for each 1,000 decks you have (rounded up, max 10% | ||
| + | | align="center" | 16.66 | ||
| + | | align="center" | [[Limited Time Artifacts]] 2016 | ||
| + | | align="center" | 2 Cyclopean Lens | ||
| + | | align="center" | ? [[Credits|CR]] | ||
| + | | align="center" | {{GameImage|artifacts/cyclens.png}} | ||
| + | |- | ||
| + | | align="center" | [[Cyclopean Lens II]] | ||
| + | | align="center" | 15 | ||
| + | | align="center" | 400 | ||
| + | | align="center" | Ability W/ cooldown: +2% attack bonus for each 1,500 decks you have (rounded up, max 10% | ||
| + | | align="center" | 16.66 | ||
| + | | align="center" | [[Limited Time Artifacts]] 2017 | ||
| + | | align="center" | 2 Cyclopean Lens | ||
| + | | align="center" | ? [[Credits|CR]] | ||
| + | | align="center" | {{GameImage|artifacts/cyclens3.png}} | ||
| + | |- | ||
| + | | align="center" | [[Cyclopean Lens III]] | ||
| + | | align="center" | 15 | ||
| + | | align="center" | 600 | ||
| + | | align="center" | Ability W/ cooldown: +3% attack bonus for each 1,500 decks you have (rounded up, max 10% | ||
| + | | align="center" | 40.0 | ||
| + | | align="center" | [[Limited Time Artifacts]] 2018 | ||
| + | | align="center" | 2 Cyclopean Lens | ||
| + | | align="center" | ? [[Credits|CR]] | ||
| + | | align="center" | {{GameImage|artifacts/cyclens4.png}} | ||
|- | |- | ||
| align="center" | [[Drone Cluster]] | | align="center" | [[Drone Cluster]] | ||
| Line 1,321: | Line 1,478: | ||
| align="center" | 1 Drone Cluster | | align="center" | 1 Drone Cluster | ||
| align="center" | 0 [[Credits|CR]] | | align="center" | 0 [[Credits|CR]] | ||
| - | | align="center" | | + | | align="center" | {{GameImage|items/cluster-b.png}} |
|- | |- | ||
| align="center" | [[Exotic Bio-Disruptor]] | | align="center" | [[Exotic Bio-Disruptor]] | ||
| Line 1,331: | Line 1,488: | ||
| align="center" | 1 Exotic Bio-Disrupter | | align="center" | 1 Exotic Bio-Disrupter | ||
| align="center" | 300M [[Credits|CR]] | | align="center" | 300M [[Credits|CR]] | ||
| - | | align="center" | | + | | align="center" | {{GameImage|items/ca-wavegen.png}} |
|- | |- | ||
| align="center" | [[Exotic Bio-Disruptor 2.0]] | | align="center" | [[Exotic Bio-Disruptor 2.0]] | ||
| Line 1,341: | Line 1,498: | ||
| align="center" | 1 Exotic Bio-Disrupter | | align="center" | 1 Exotic Bio-Disrupter | ||
| align="center" | 300M [[Credits|CR]] | | align="center" | 300M [[Credits|CR]] | ||
| - | | align="center" | | + | | align="center" | {{GameImage|items/ca-wavegen.png}} |
|- | |- | ||
| align="center" | [[Nightclaw Fighter]] | | align="center" | [[Nightclaw Fighter]] | ||
| Line 1,351: | Line 1,508: | ||
| align="center" | 2 Fighters | | align="center" | 2 Fighters | ||
| align="center" | 50M [[Credits|CR]] | | align="center" | 50M [[Credits|CR]] | ||
| - | | align="center" | | + | | align="center" | {{GameImage|artifacts/m-fighter2.png}} |
|- | |- | ||
| align="center" | [[Prototype Mech VX]] | | align="center" | [[Prototype Mech VX]] | ||
| Line 1,361: | Line 1,518: | ||
| align="center" | 1 Protoype Mech XV | | align="center" | 1 Protoype Mech XV | ||
| align="center" | 0 [[Credits|CR]] | | align="center" | 0 [[Credits|CR]] | ||
| - | | align="center" | | + | | align="center" | {{GameImage|items/mech.png}} |
|- | |- | ||
| align="center" | [[Raix Megaweapon]] | | align="center" | [[Raix Megaweapon]] | ||
| Line 1,371: | Line 1,528: | ||
| align="center" | 1 Raix Megaweapon | | align="center" | 1 Raix Megaweapon | ||
| align="center" | 450M [[Credits|CR]] | | align="center" | 450M [[Credits|CR]] | ||
| - | | align="center" | | + | | align="center" | {{GameImage|artifacts/raixdrive.png}} |
|} | |} | ||
Current revision as of 21:15, 26 May 2024
Weapons are Equipment that increases your ships Attack. Better weapons are unlocked by putting Research into the "Advanced Weapons" line. There can be up to 8 researched weapons installed at once. The effectiveness of weapons can be increased by using Artifacts.
The current maximum Attack that can be obtained purely from researchable weapons (ignoring any artifact, Race or Profession bonuses) is from 8 Heavy Quasi-Chaotic Blasters 100% upgraded with Havoc Coils, which give 6832 Attack for 440 decks and take a total upkeep of 16,400,000,000 (16.4 billion) credits per day.
Contents |
Researchable Advanced Weapons
| Version | Type | Size | ATK (Attack) | ATK/Deck | CR Cost | Mineral Cost | Upkeep per Day | Required Research | Image URL |
|---|---|---|---|---|---|---|---|---|---|
| Medium1 | Autocannon | 3 | 1 | 0.333 | 300 CR | None | 15 CR | None | 
|
| Heavy | Autocannon | 4 | 2 | 0.500 | 600 CR | None | 30 CR | Advanced Weapons | 
|
| Light | Mass Driver | 5 | 3 | 0.600 | 1,000 CR | None | 50 CR | Linear Induction | 
|
| Medium1 | Mass Driver | 6 | 5 | 0.833 | 1,400 CR | None | 70 CR | Linear Induction | 
|
| Heavy | Mass Driver | 7 | 7 | 1.000 | 1,960 CR | None | 98 CR | Linear Induction | 
|
| Light | Laser Cannon | 9 | 12 | 1.333 | 3,842 CR | 77 Dynite | 192 CR | Laser Focusing | 
|
| Medium1 | Laser Cannon | 10 | 15 | 1.500 | 5,378 CR | 108 Dynite | 269 CR | Laser Focusing | 
|
| Heavy | Laser Cannon | 11 | 18 | 1.636 | 7,500 CR | 150 Dynite | 375 CR | Laser Focusing | 
|
| Light | Ion Cannon | 13 | 25 | 1.923 | 14,800 CR | 30 Chrisium | 740 CR | Ion Channelling | 
|
| Medium1 | Ion Cannon | 14 | 29 | 2.071 | 20,600 CR | 41 Chrisium | 1,000 CR | Ion Channelling | 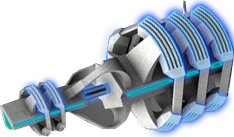
|
| Heavy | Ion Cannon | 15 | 33 | 2.200 | 28,900 CR | 58 Chrisium | 1,400 CR | Ion Channelling | 
|
| Light | Plasma Cannon | 17 | 42 | 2.470 | 56,700 CR | 11 Darrinyte | 2,800 CR | Plasma Filtering | 
|
| Medium1 | Plasma Cannon | 18 | 47 | 2.611 | 79,400 CR | 16 Darrinyte | 4,000 CR | Plasma Filtering | 
|
| Heavy | Plasma Cannon | 19 | 52 | 2.736 | 111,000 CR | 22 Darrinyte | 5,600 CR | Plasma Filtering | 
|
| Light | Phase Cannon | 21 | 63 | 3.000 | 218,000 CR | 9 Hydium | 10,900 CR | Phased Energy | 
|
| Medium1 | Phase Cannon | 22 | 69 | 3.136 | 304,000 CR | 12 Hydium | 15,200 CR | Phased Energy | 
|
| Heavy | Phase Cannon | 23 | 75 | 3.260 | 427,000 CR | 17 Hydium | 21,400 CR | Phased Energy | 
|
| Light | Graviton Shearer | 25 | 88 | 3.520 | 837,000 CR | 17 Erixion | 41,900 CR | Graviton Shearing | 
|
| Medium1 | Graviton Shearer | 26 | 95 | 3.653 | 1,171,000 CR | 23 Erixion | 58,600 CR | Graviton Shearing | 
|
| Heavy | Graviton Shearer | 27 | 102 | 3.777 | 1,640,000 CR | 33 Erixion | 82,000 CR | Graviton Shearing | 
|
| Light | Disruptor Cannon | 29 | 117 | 4.034 | 3,200,000 CR | 13 Pawlacite | 160,000 CR | Matter Disruption | 
|
| Medium1 | Disruptor Cannon | 30 | 125 | 4.166 | 4,500,000 CR | 18 Pawlacite | 225,000 CR | Matter Disruption | 
|
| Heavy | Disruptor Cannon | 31 | 133 | 4.290 | 6,300,000 CR | 25 Pawlacite | 315,000 CR | Matter Disruption | 
|
| Light | Quantum Devastator | 33 | 150 | 4.545 | 12,350,000 CR | 25 Dieterion | 617,500 CR | Quantum Disassembly | 
|
| Medium1 | Quantum Devastator | 34 | 159 | 4.676 | 17,200,000 CR | 34 Dieterion | 860,000 CR | Quantum Disassembly | 
|
| Heavy | Quantum Devastator | 35 | 168 | 4.800 | 24,200,000 CR | 48 Dieterion | 1,200,000 CR | Quantum Disassembly | 
|
| Light | Singularity Launcher | 37 | 187 | 5.054 | 47,400,000 CR | 47 Dysillon | 2,370,000 CR | Micro Singularities | 
|
| Medium1 | Singularity Launcher | 38 | 197 | 5.184 | 66,400,000 CR | 66 Dysillon | 3,320,000 CR | Micro Singularities | 
|
| Heavy | Singularity Launcher | 39 | 207 | 5.308 | 93,000,000 CR | 93 Dysillon | 4,650,000 CR | Micro Singularities | 
|
| Light | Antiproton Cannon | 41 | 228 | 5.561 | 183,000,000 CR | 37 Kurenite | 9,150,000 CR | Antimatter Streams | 
|
| Medium1 | Antiproton Cannon | 42 | 239 | 5.690 | 255,000,000 CR | 51 Kurenite | 12,750,000 CR | Antimatter Streams | 
|
| Heavy | Antiproton Cannon | 43 | 250 | 5.814 | 357,000,000 CR | 71 Kurenite | 17,900,000 CR | Antimatter Streams | 
|
| Light | Null Ray | 45 | 274 | 6.088 | 700,000,000 CR | 200 Kurenite | 35,000,000 CR | Null Rays | 
|
| Medium1 | Null Ray | 46 | 287 | 6.239 | 980,000,000 CR | 300 Kurenite | 49,000,000 CR | Null Rays | 
|
| Heavy | Null Ray | 47 | 300 | 6.383 | 1,350,000,000 CR | 500 Kurenite | 67,500,000 CR | Null Rays | 
|
| Light | Thetacron Cannon | 49 | 328 | 6.694 | 2,650,000,000 CR | 800 Kurenite | 132,500,000 CR | Thetacron Radiation | 
|
| Medium1 | Thetacron Cannon | 50 | 343 | 6.860 | 3,750,000,000 CR | 1,200 Kurenite | 187,500,000 CR | Thetacron Radiation | 
|
| Heavy | Thetacron Cannon2 | 51 | 358 | 7.020 | 5,200,000,000 CR | 1,600 Kurenite | 260,000,000 CR | Thetacron Radiation | 
|
| Light | Quasi-Chaotic Blaster2 | 53 | 391 | 7.377 | 10,200,000,000 CR | 2,600 Kurenite | 510,000,000 CR | Quasi-Chaotic Force | 
|
| Medium1 | Quasi-Chaotic Blaster2 | 54 | 409 | 7.574 | 14,500,000,000 CR | 3,600 Kurenite | 725,000,000 CR | Quasi-Chaotic Force | 
|
| Heavy | Quasi-Chaotic Blaster2 | 55 | 427 | 7.763 | 20,500,000,000 CR | 4,800 Kurenite | 1,025,000,000 CR | Quasi-Chaotic Force | 
|
1 Medium Weapons DO NOT display ANY SubType in their name within the game, Ie. the "Medium Autocannon" is actually displayed ingame as simply "Autocannon". The "medium" name is used here only to underscore their actual role as a game mechanic.
2 All standard weapons can be upgraded using Havoc Coils - the reward from the second task of the Foundry of War legion mission, which increase the attack and upkeep by 20% up to a maximum of 100%. Due to the energy you are likely to expend in obtaining these, it is not recommended to use them on anything less than Heavy Thetacron Cannons.
The coils will upgrade one of your installed standard weapons at random, eventually it would take 40 of them to upgrade 8 weapons. A Heavy Quasi-Chaotic Blaster with 5 upgrades (100%) currently has the third highest attack/deckspace ratio in the game, after a Galakis Pirate Ray with 5 upgrades (200%) as well as a Dominion Tri-blaster.
Discoverable or Salvageable Advanced Weapons
Many weapons can be obtained from completing missions or defeating NPCs or other players. These can be installed in addition to your 8 researched weapon modules, but are subject to their own limits on how many of each type can be installed.
Special Seasonal NPCs - Hallows Bane Series
The Hallows Bane weapon series are available as a drop from special NPC's that are available for two weeks during the Hallows Bane (Halloween) event every year.
| Name | Size | ATK (Attack) | Second Bonus | ATK/Deck | Gained From | Equip Limit | Image URL | Upkeep per Day | First Appeared |
|---|---|---|---|---|---|---|---|---|---|
| Bane Emitter3 | 10 | 20 | +20 invasion-only attack | 2.000 | NPC: Bane Revenant | 4 Bane Emitters | 
| ? CR | 2010 Event |
| Charged Bane Emitter3 | 12 | 30 | +30 invasion-only attack | 2.500 | NPC: Bane Revenant | 4 Bane Emitters |
| 25,000 CR | 2010 Event |
| Overcharged Bane Emitter3 | 13 | 45 | +45 invasion-only attack | 3.462 | NPC: Bane Eidolon | 4 Bane Emitters | 
| 250,000 CR | 2011 Event |
| Hypercharged Bane Emitter3 | 14 | 60 | +60 invasion-only attack | 4.286 | NPC: Bane Eidolon | 4 Bane Emitters | 
| 2,500,000 CR | 2011 Event |
| Megacharged Bane Emitter3 | 15 | 75 | +75 invasion-only attack | 5.000 | NPC: Bane Reaver | 4 Bane Emitters | 
| 50,000,000 CR | 2012 Event |
| Terrorcharged Bane Emitter3 | 16 | 90 | +90 invasion-only attack | 5.625 | NPC: Bane Phantom | 4 Bane Emitters | 
| 500M CR | 2013 Event |
| Horrorcharged Bane Emitter3 | 17 | 120 | +120 invasion-only attack | 7.059 | NPC: Bane Dread | 4 Bane Emitters | 
| 1B CR | 2014 Event |
| Dreadcharged Bane Emitter3 | 17 | 150 | +150 invasion-only attack | 8.82 | NPC: Bane Dread | 4 Bane Emitters | 
| ?B CR | 2017 Event |
| Vilecharged Bane Emitter3 | 17 | 180 | +180 invasion-only attack | 10.58 | NPC: Bane Fright | 4 Bane Emitters | 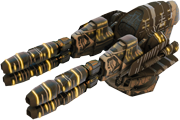
| ?B CR | 2018 Event |
| Foulcharged Bane Emitter3 | 17 | 220 | +220 invasion-only attack | 12.94 | NPC: Bane Fright | 4 Bane Emitters | 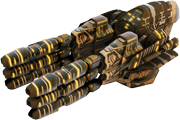
| ?B CR | 2018 Event |
| Dark Arbalest | 15 | 90 | +80 cloak. Ability (with cooldown): -8% defense to a targeted enemy planet for 1 hour. | 6.000 | The Artifact market at 58 GP each. | 2 Dark Arbalests | 
| 857.4K CR | 2014 Event |
| Dark Arbalest II | 15 | 120 | +100 cloak. Ability (with cooldown): -10% defense to a targeted enemy planet for 1 hour. | 6.000 | The Artifact market at 47 GP each. | 2 Dark Arbalests | 
| ?K CR | 2015 Event |
| Dark Arbalest III | 15 | 170 | +140 cloak. Ability (with cooldown): -12% defense to a targeted enemy planet for 1 hour. | 6.000 | The Artifact market at 47 GP each. | 2 Dark Arbalests | 
| ?K CR | 2016 Event |
| Dark Arbalest IV | 15 | 240 | +200 cloak. Ability (with cooldown): -15% defense to a targeted enemy planet for 1 hour. | 6.000 | The Artifact market at 47 GP each. | 2 Dark Arbalests | 
| ?K CR | 2017 Event |
| Dark Arbalest V | 15 | 330 | +280 cloak. Ability (with cooldown): -19% defense to a targeted enemy planet for 1 hour. | 6.000 | The Artifact market at 47 GP each. | 2 Dark Arbalests | 
| ?K CR | 2018 Event |
3 If you receive one of the above weapons after you kill a Bane Revenant or Bane Eidolon, the version you receive is based on your rank at the time of receiving it. Ships of Rank 1-49 receive the standard version, ships of Rank 50-149 receive the charged version, and ships of Rank 150 and above randomly receive either the Overcharged or Hypercharged version. The MegaCharged Bane Emitter is only dropped by Bane Reavers (ranks 500+), the TerrorCharged Bane Emitter and Horrorcharged Bane Emitter are only dropped by Bane Phantoms (ranks 1,000+), and the DreadCharged Bane Emitter is only dropped by Bane Dreads (ranks 1,500+?) or Bane Frights (ranks 2,200+?). Once received, these weapons may be installed/used at any time, but they can only be received during the Hallows Bane events. As of 2016, all Bane weapons can be upgraded to the next weapon level with 30% higher stats than the original version of the same type via the Bane Emission Corruptor artifact. If you haven't got one, just wait until Halloween this year for another chance!
NPC - Crimson Series
The Crimson series of weapons may be dropped by destroying elite NPC's of the Crimson Blades faction. Elite NPC's can be targeted by multiple players of the same legion and can drop several weapons or artifacts.
| Name | Size | ATK (Attack) | Second Bonus | ATK/Deck | Gained From | Equip Limit | Image URL | Upkeep per Day |
|---|---|---|---|---|---|---|---|---|
| Crimson Auto-Laser | 5 | 25 | None | 5.000 | NPC: Crimson Armory, Crimson Vault, Vortul, Crimson Annihilator | 4 Crimson Weapons | 
| ? CR |
| Crimson Auto-Phaser | 8 | 40 | None | 5.000 | NPC: Crimson Armory, Vortul, Crimson Annihilator | 4 Crimson Weapons | 
| 12,500 CR |
| Vortul Blast Phaser | 12 | 75 | None | 6.250 | NPC: Vortul, Crimson Annihilator | 4 Crimson Weapons | 
| 25,000 CR |
| Korteth Twin-Blaster | 14 | 100 | None | 7.143 | NPC: Korteth, Crimson Carrier | 4 Crimson Weapons | 
| 125,000 CR |
| Korteth Twin-Blaster (100% upgrade) | 14 | 200 | None | 14.286 | NPCs: Korteth, Crimson Carrier and at least 4 Kelethor, Crimson Haulers | 4 Crimson Weapons |
| 375,000 CR |
Elite PvP Combat - Dominion Cannon Series
The Dominion Cannons can be bought via the battle market of the battle tab. They cost red badges, which themselves can only be gained through fighting and destroying other players.
| Name | Size | ATK (Attack) | Second Bonus | ATK/Deck | Gained From | Equip Limit | Image URL | Upkeep per Day |
|---|---|---|---|---|---|---|---|---|
| Dominion Cannon | 8 | 50 | None | 6.250 | Battle Market: 40 Red Badges | 4 Dominion Cannons | 
| 5,000 CR |
| Dominion Cannon - Mark II | 12 | 90 | None | 7.500 | Battle Market: 72 Red Badges | 4 Dominion Cannons | 
| 25,000 CR |
| Dominion Cannon - Mark III | 17 | 150 | None | 8.824 | Battle Market: 128 Red Badges | 4 Dominion Cannons | 
| 250,000 CR |
| Dominion Auto-Blaster4 | 17 | 230 | None | 13.529 | Battle Market: 184 Red Badges4 | 4 Dominion Cannons | 
| 5,000,000 CR |
| Dominion Tri-Blaster5 | 17 | 310 | None | 18.235 | Battle Market: 272 Red Badges5 | 4 Dominion Cannons | 
| 50,000,000 CR |
4 The Dominion Auto-Blaster is an upgrade of, rather than a replacement of, the Dominion Cannon Mark III. To build one, you need to purchase a Dominion Cannon - Mark III for 128 Red Badges, and use a Dominion Auto-Blaster Upgrade on it, which costs a further 184 Red Badges. This makes the actual total cost of each Dominion Auto-Blaster 312 Red Badges. You also need 550 medal points to unlock the Auto-Blasters in the Battle Market. Costs 500 energy to use each upgrade.
5 The Dominion Tri-Blaster is an upgrade of, rather than a replacement of, the Dominion Auto-Blaster. To build one, you need to purchase a Dominion Cannon - Mark III for 128 Red Badges, then use a Dominion Auto-Blaster Upgrade on it, and then a Dominion Tri-Blaster Upgrade on it, which costs a further 184 & 272 Red Badges respectively. This makes the actual total cost of each Dominion Tri-Blaster 584 Red Badges. You also need 550 medal points to unlock the Auto-Blasters and 800 medal points to unlock the Tri-Blaster in the Battle Market. Costs 800 Energy to use each upgrade.
While this requires a lot of work in obtaining red badges and medal points, they have one of the highest attack/deckspace ratios in the game, especially at low/mid ranks (below 300) where legion missions are not practical, and Kelethor upgrades (rank 750+) are not available. They also have a relatively low upkeep cost in CR, so they are worth the effort.
Other NPCs
Some weapons may be dropped by other rare NPC's. They are individual, one-off weapons, rather than being part of a chain of gradually-improving weapons.
| Name | Size | ATK (Attack) | Second Bonus | ATK/Deck | Gained From | Equip Limit | Image URL | Upkeep per Day |
|---|---|---|---|---|---|---|---|---|
| Bralkir Ritual Chamber | 25 | 50 | 150 Hull, +100 Invasion Attack | 2 | NPC: Bralkir Vicar | 1 Bralkir Ritual Chamber | 
| 75M CR |
| Elios Stormburst Ray | 20 | 80 | 100 Energy | 4 | NPC: Cosmiren, Elios Luminary | 2 Elios Stormburst Rays | 
| 75M CR |
| Furlinium-D Spanner | 20 | 70 | 80 Cloak | 3.5 | NPC: Chuhn Merchant 2014 | 2 Furlinium-D Spanners | 
| ? CR |
| Furlinium-E Spanner | 22 | 80 | 90 Cloak | 3.63 | NPC: Chuhn Merchant 2015 | 2 Furlinium-E Spanners | 
| ? CR |
| Furlinium-F Spanner | 24 | 100 | 110 Cloak | 4.16 | NPC: Chuhn Merchant 2016 | 2 Furlinium-F Spanners | 
| ? CR |
| Furlinium-G Spanner | 26 | 130 | 140 Cloak | 5.0 | NPC: Chuhn Merchant 2017 | 2 Furlinium-G Spanners | 
| ? CR |
| Furlinium-H Spanner | 28 | 170 | 180 Cloak | 6.07 | NPC: Chuhn Merchant 2018 | 2 Furlinium-G Spanners | 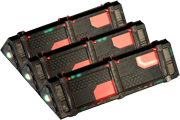
| ? CR |
| Lazuli Mind Controller | 8 | 35 | +35 invasion-only attack | 4.375 | NPC: Reynard, Lazuli Titan | 3 Lazuli Weapons | 
| 25,000 CR |
| Ion Pulse Ballistae6 | 10 | 80 | -40 Energy6 | 8 | NPC: Drannik Ballistae | 4 Drannik Weapons | 
| 125,000 CR |
| Zebeeren's Cannon | 15 | 110 | Seasonal NPC | 7.333 | NPC: Zebeeren, Scruuge Despot | 2 Zebeeren's Cannons | 
| ? CR |
6 The Ion Pulse Ballistae reduces your max energy by 40 per Ion Pulse Ballistae when equipped, therefore if all four Ion Pulse Ballistae are equipped, they will reduce your max energy by 160. If unequipped, your max energy will return to normal. It is therefore strongly suggested that you unequip all of your Ion Pulse Ballistae before you level up or use Energy Boosters, such as an Energy Cube, Tri-Matrix Emblem, or XX of Independence, to ensure you receive the maximum energy refill possible from these artifacts. Also do the same thing before you rank up.
Mission-Exclusive Weapons
Some weapons can only be gained through completing specific missions.
| Name | Size | ATK (Attack) | Second Bonus | ATK/Deck | Gained From | Equip Limit | Image URL | Upkeep per Day |
|---|---|---|---|---|---|---|---|---|
| Exotic Pulser | 5 | 30 | -10 Energy7 | 6.000 | Mission: Slowing the Prejor Advance | 3 Exotic Pulsers | 
| 2,100 CR |
| Psionic Amplifier | 10 | 30 | +30 invasion-only attack | 3.000 | Mission: Harnessing the Weapon | 1 Psionic Amplifier | 
| 8,600 CR |
| Leviathan Rift-Emitter | 13 | 30 | 35 Cloak | 2.307 | NPC: Octafari Leviathan | 4 Octafari Weapons | 
| 5,000 CR |
| Taltherian Sentry | 16 | 55 | 55 Defense | 3.437 | Mission: Unwelcome Visitors | 4 Taltherian Sentries | 
| ? CR |
| Dark Smuggler Chassis | 25 | 600 (Invasion) | Applies Disguise8 | 0 | Mission: Furtive Adjustments | 1 Dark Smuggler Chassis | 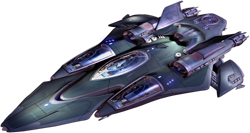
| ? CR |
| Modulated Xecti Disruptor (No Racial Bonus) | 15 | 209 | 40 Cloak9 | 1.39 | Mission: Desperate Confinement | 4 Xecti Disruptors | 
| 3,700 (?) CR |
| Modulated Xecti Disruptor (Zolazin, Spies, and Hackers) | 15 | 209 | 80 Cloak9 | 1.39 | Mission: Desperate Confinement | 4 Xecti Disruptors |
| 3,700 (?) CR |
| Modulated Xecti Disruptor (Konqul, Dranik, and Raiders) | 15 | 409 | 40 Cloak9 | 2.69 | Mission: Desperate Confinement | 4 Xecti Disruptors |
| 3,700 (?) CR |
| T.O. Cyclobeam Charger | 20 | 90 | 180 Shield | 4.5 | NPC: T.O. Sector Warden spawned on completion of Mission: Ravyn's Return | 3 Cyclobeam Chargers | 
| 55M CR |
| T-Plasma Gemini Cannon | 15 | 160 | 2% chance to do additional 10% hull/shield damage10 | 10.667 | Mission: Weaponizing T-Plasma | 3 Gemini Cannons | 
| 25M CR |
| Uldri Wave Ejector (500% Upgrade) | 20 | 180 | 180 Energy, 120 Cloak | 9 | Mission: A Fateful Decision | 1 Uldri Wave Ejector | 
| 150M CR |
7 The Exotic Pulser reduces your max energy by 10 Per Exotic Pulser when equipped, therefore if all three available Exotic Pulsers are equipped, they will reduce your max energy by 30. If unequipped, your max energy will return to normal. Furthermore, it is strongly suggested that you unequip all of your Exotic Pulsers before you level up or use Energy Boosters, such as an Energy Cube, Tri-Matrix Emblem, or Insignia of Independence, to ensure you receive the maximum energy refill possible from these artifacts. Also do the same thing before you rank up.
8 Applies a disguise to your ship that makes it appear to be a Dark Smuggler to any other ship that targets you, that is to say, it hides your Race and Profession. It also changes the physical look of your ship to support this illusion. Installing it will make your ship look like {{GameImage|npcs/darkfscout.png This.]
9 While Installed: Zolazin, Spies, and Hackers get double the Cloak bonus; meanwhile, Konqul, Drannik, and Raiders get double the Attack bonus.
10 Each additional cannon increases the percentage chance (up to 6.1208% with 3) but not the percentage damage.
Legion Mission-Exclusive Weapons
These weapons are available only from completing specific tasks during Legion missions, which are a special type of collaborative mission that is undertaken by an entire legion rather than just individual players. Each mission has three tasks that must all be completed, but each player may only complete one of the tasks, meaning a legion must carefully decide who does each task. Legion missions last for three days (72 hours), but this can be both increased - or decreased - by spending Galaxy Points.
| Name | Size | ATK (Attack) | Second Bonus | ATK / Deck | Mission | Task | Equip Limit | Upkeep per Day | Image URL |
|---|---|---|---|---|---|---|---|---|---|
| Carjean Scatterlauncher (200% Upgrade) | 24 | 270 | +180 Defense, +4% Base Attack | 11.25 | Carjean: The Heist | Disable The Carjean Sentry Patrols | 1 Carjean Scatterlauncher | 109.2M CR With 3 Bots | 
|
| Cerulean Autosync Beam (200% Upgrade) | 24 | 390 | Activated Ability11 | 16.25 | Roathir: Hostile Takeover | Assault Cerulean Bases | 1 Cerulean Autosync Beam | 1.2B CR With 3 Bots | 
|
| Chronostatic Pulser (200% Upgrade) | 19 | 240 | 75 Energy | 12.63 | Disturbance at Ryelis | Remove Orbital Waste and Place Cannons | 1 Chronostatic Pulser | 109.3M CR With 3 Bots | 
|
| Darmos Drone (200% Upgrade) | 35 | 210 | +210 Defense, +300 Hull | 6 | Arenas of the Darmos Games | Ring of Champions | 1 Darmos Drone | ? CR | 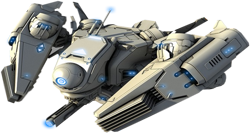
|
| Galakis Pirate Ray (200% Upgrade) | 18 | 300 | - | 16.66 | Galakis, City of Deals | Reduce Piracy along Routes | 1 Pirate Ray | 109.3M CR With 3 Bots | 
|
| Gammacron Trap Bay | 25 | 60 | Defence +60; Activated Ability12 | 2.4 | Foundry of War | Perform Mine Yield Tests | 2 Trap Bays | 38.6M CR With 3 Bots | 
|
| Morphogenic Suits (200% upgrade) | 25 | 300 | 600 Invasion Attack Activated Ability13 | 12 | The Hunt for Mawks: Showdown in Taladar | Find Lady Mawks | 1 Morphogenic Suit | 1.16B CR With 3 Bots | 
|
| Sniper Drone (200% Upgrade) | 25 | 225 | 750 Hull | 9.000 | Assault on Crimson Deep-6 | Disable Sniper Drones | 1 Sniper Drone | 142.5M CR | 
|
| Vorean Bio-Ray | 15 | 0 | Invasion-only Attack: 200; Activated Ability14 | 13.33 (Invasion Only) | Vorean Extinction | Bioweapon Research | 2 Vorean Bio-Rays | 50M CR | 
|
11Activated Ability: Permanently increases attack by 10. Costs 5,000 Exotic Matter to use. Cooldown: 20 hours.
12Activated Ability (with 5 charges refillable via Galaxy Points): Sets a Gammacon Trap for 1 week. If tripped, the attacking ship will be dealt damage equal to 50% of its maximum hull + shield.
13Activated Ability: Increases passive cloak on a planet by 75 - up to a maximum of 6,000. Costs 5,000 Exotic Matter to use. Cooldown: 40 hours
14Activated Ability (with 2 charges refillable via Galaxy Points): Vorean Biocharge, increases invasion attack by 8% for 1 hour.
Radiant Weapons
Currently only one type of Radiant Weapon is available, the Radiant Surge Cannon.
Radiant Surge Cannons are obtained by purchasing the Radiant Surge Cannon artifact from the Artifact Market at a price of 48 Galaxy Points. When the Radiant Surge Cannon artifact is used from your trade menu, a Radiant Surge cannon will be created and installed on your ship. The Radiant Surge Cannon that is produced changes depending on what your ship's rank is at the time the artifact was used to create the weapon.
Note: if your level increases whilst you have have one of these weapons, the Cannon will NOT upgrade to match your new level; you will need to buy a new Radiant Surge Cannon for more Galaxy Points. The actual cost of the Cannons is the same regardless of your level.
The highest Cannon observed on a player is Mark IX (9). It is believed that this is the highest available level, as there are players at level 1700+ that still have Mark IX's installed. Also see the note below about the Mark IX cannons; they are not as powerful as they *should* be.
- Image: {{GameImage|items/radiant.png Radiant Surge Cannon].
| Version | Size | (ATK) Attack | ATK/Deck | Rank Range | Equip Limit | Upkeep Cost | Sells for/ Repair Cost |
|---|---|---|---|---|---|---|---|
| Mark I | 9 | 40 | 4.44 | Ranks 1 - 99 | 2 Radiant Weapons | 250 CR | 5,000 CR |
| Mark II | 12 | 60 | 5.00 | Ranks 100 - 199 | 2 Radiant Weapons | 25,000 CR | 250,000 CR |
| Mark III | 17 | 100 | 5.88 | Ranks 200 - 299 | 2 Radiant Weapons | 250,000 CR | 2,500,000 CR |
| Mark IV | 20 | 150 | 7.50 | Ranks 300 - 399 | 2 Radiant Weapons | 250,000 CR | 5,000,000 CR |
| Mark V | 24 | 200 | 8.33 | Ranks 400 - 499 | 2 Radiant Weapons | ?? CR | ?? CR |
| Mark VI | 30 | 300 | 10.00 | Ranks 500 - 599 | 2 Radiant Weapons | 25,000,000 CR | 350,000,000 CR |
| Mark VII | 36 | 400 | 11.11 | Ranks 600 - 699 | 2 Radiant Weapons | 100,000,000 CR | 1,000,000,000 CR |
| Mark VIII | 40 | 550 | 13.75 | Ranks 700 - 799 | 2 Radiant Weapons | 150,000,000 CR | ?? CR |
| Mark IX | 50 | 675 | 13.5015 | Ranks 800+ | 2 Radiant Weapons | 200,000,000 CR | 4,000,000,000 CR |
15This is not a mistake. The Mark IX Radiant Surge Cannon does not follow the pattern of the other Radiant weapons in attack strength. It is less deckspace efficient than the less powerful variants it replaces, because it does not receive as large an attack bonus. It is unknown why this is the case. If it had followed the standard pattern, it would have 700 or even 750 attack, which would respectively give an ATK/Deck ratio of 14.00 or even 15.00.
Other Weapons
These weapons are obtained from avenues other than NPC's or missions.
| Weapon | Size | (ATK) Attack | Other Bonus | ATK/Deck | Obtained From | Equip Limit | Upkeep Cost | Image |
|---|---|---|---|---|---|---|---|---|
| Atmospheric Decimator | 10 | 0 | +100 Invasion Attack +7% Bonus | 0 | Battle Market Artifacts | 2 Decimators | 50,000 CR | 
|
| Biospheric Decimator | 10 | 0 | +250 Invasion Attack +9% Bonus | 0 | Battle Market Artifacts | 2 Decimators | 750,000 CR | 
|
| Cerulean Fighter | 15 | 100 | +100 Defense | 6.67 | Medal: Daily Perspectives | 2 Fighters | 12.5M CR | 
|
| Chromatic Cannon | 15 | 75 | +5% Base Attack | 5 | Limited Time Artifacts 2013 | 2 Chromatic Cannons | ? CR | 
|
| Chromatic Cannon 2.0 | 15 | 125 | +7% Base Attack | 8.33 | Limited Time Artifacts 2014 | 2 Chromatic Cannons | ? CR | 
|
| Chromatic Cannon 3.0 | 15 | 175 | +9% Base Attack | 11.67 | Limited Time Artifacts 2015 | 2 Chromatic Cannons | ? CR | 
|
| Chromatic Cannon 4.0 | 15 | 250 | +11% Base Attack | 16.66 | Limited Time Artifacts 2016 | 2 Chromatic Cannons | 81M CR | 
|
| Chromatic Cannon 5.0 | 15 | 350 | +13% Base Attack | 23.33 | Limited Time Artifacts 2017 | 2 Chromatic Cannons | ?M CR | 
|
| Chromatic Cannon 6.0 | 15 | 475 | +15% Base Attack | 31.66 | Limited Time Artifacts 2018 | 2 Chromatic Cannons | ?M CR | 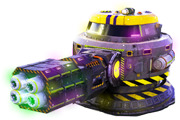
|
| CK69 Assault Sentry (500% upgrade) | 20 | 300 | +300 Defense, +900 Hull | 15 | Battle Market Artifacts | 1 CK Assault Sentry | 600M CR | 
|
| Combat Analyzer | 0 | 15 | +5 Defense | ∞ | Completing 30 missions | 1 Combat Analyzer | 0 CR | 
|
| Composite Ray | 13 | 80 | +40 Defense OR +40 Scan OR +60 Cloak | 6.15 | Battle Market Artifacts | 1 Exotic Bio-Disrupter | 40M CR |
|
| Cosmic Rail (500% upgrade) | 20 | 360 | +360 Defense, +360 Cloak, +360 Energy | 18 | Battle Market Artifacts | 1 Cosmic Rail | 300M CR | 
|
| Cyclopean Lens | 15 | 250 | Ability W/ cooldown: +1% attack bonus for each 1,000 decks you have (rounded up, max 10% | 16.66 | Limited Time Artifacts 2016 | 2 Cyclopean Lens | ? CR | 
|
| Cyclopean Lens II | 15 | 400 | Ability W/ cooldown: +2% attack bonus for each 1,500 decks you have (rounded up, max 10% | 16.66 | Limited Time Artifacts 2017 | 2 Cyclopean Lens | ? CR | 
|
| Cyclopean Lens III | 15 | 600 | Ability W/ cooldown: +3% attack bonus for each 1,500 decks you have (rounded up, max 10% | 40.0 | Limited Time Artifacts 2018 | 2 Cyclopean Lens | ? CR | 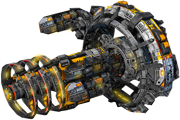
|
| Drone Cluster | 0 | 20 | +40 Hull | ∞ | Completing 66 Missions | 1 Drone Cluster | 0 CR | 
|
| Exotic Bio-Disruptor | 12 | 0 | +250 Invasion Attack +5% Bonus | 0 | King of the Hill | 1 Exotic Bio-Disrupter | 300M CR | 
|
| Exotic Bio-Disruptor 2.0 | 12 | 0 | +350 Invasion Attack +6% Bonus | 0 | King of the Hill 2.0 | 1 Exotic Bio-Disrupter | 300M CR |
|
| Nightclaw Fighter | 25 | 250 | +250 Defense | 10 | Medal: Can't get you out of my mind | 2 Fighters | 50M CR | 
|
| Prototype Mech VX | 0 | 0 | +15 Invasion Attack | 0 | Completing 15 Missions | 1 Protoype Mech XV | 0 CR | 
|
| Raix Megaweapon | 30 | 90 | - | 3 | Raix Market | 1 Raix Megaweapon | 450M CR | 
|